My previous post (LINK) showed some pics of the first few steps of building this hill, namely:
(1) Carve contour out of 1.5" foam, using mix of coping saw, dovetail saw, utility knife, and X-acto hobby saw.
(2) Trace footprint of hill onto model aircraft plywood, cut plywood & glue to base of foam using white glue.
(3) Turn contour upside-down and stack books and reams of paper onto plywood so it dries and seals tightly.
(4) Cover carved foam edges with ELMER'S WOOD FILLER (or any similar material).
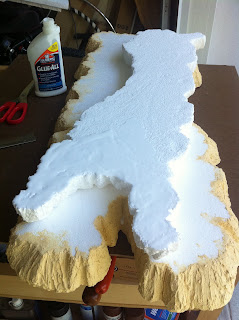
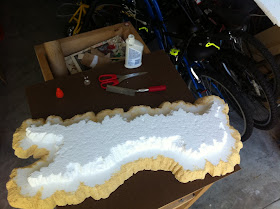
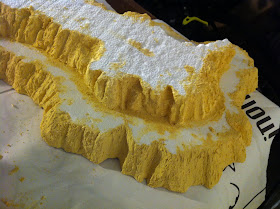
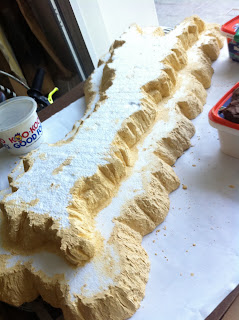
...we pic up the "story in pictures" below, having carved a 2nd contour and preparing to glue it down atop the first.
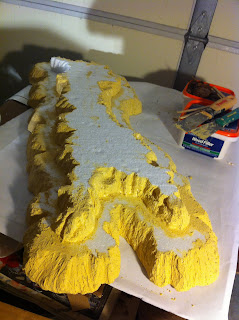
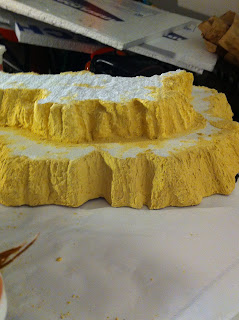
In the past I have kept my hill contours separate, for greatest versatility when laying out tabletop terrain, but since this new hill is being built primarily to look good, I decided to permanently glue the 2nd contour down, so the edges of both contours could be sloped and their surfaces textured to match my terrain boards.
NOTE: if you plan on using SPRAY-PAINT for your base or "primer" coat of paint, it is very important to COVER EVERY SPOT OF EXPOSED FOAM with wood filler or whatever spackle material you are using (I'm referring to those areas of foam which have not been covered with sand or pebbles). Any foam spots that are left bare and exposed to spray-paint will be eaten away by the aerosol spray. You can avoid this potential problem altogether by simply brushing on your base/primer coat with black latex house-paint.
COLORS:
I used the following colors for this hill, all of which -- except for the black base coat -- are identical to those used for my terrain boards:
1. BLACK
2. BROWN (matched to Delta Ceramcoat "Dark Brown")
3. FAWN (matched to Folk Art "Fawn")
4. HONEYCOMB (matched to Folk Art "Honeycomb")
5. MUDSTONE (matched to Delta Ceramcoat "Mudstone")
6. SANDSTONE (matched to Delta Ceramcoat "Sandstone")
7. RAIN GRAY (matched to Delta Ceramcoat "Rain Gray")
8. QUAKER GRAY (matched to Delta Ceramcoat "Quaker Gray")
9. Final highlight coat of SANDSTONE
I used successively lighter dry-brushing as I proceeded, going from near-total coverage with the first coat of BROWN, to a very light touch with the final coats of Quaker Gray and Sandstone.
BEFORE PAINTING I textured the surface of both contours.
First I dug some spots out of the foam surface and glued in some small WOOD-CHIPS, which are meant to look like large slabs of rock-face or boulders. In addition to simply looking good, I did this so the hill wood blend in better with the previous hill I made almost entirely out of wood-chips (LINK).
After adding a few wood-chips, I spread some scattered patches of WOOD FILLER on the contour surfaces as well. I started doing this when I first textured my terrain boards, because I didn't want them to look too "perfect" from edge to edge, with nothing but an unbroken stretch of sand. I felt like that would look more like the Sahara or Arabian Deserts, as opposed to the more mixed ground cover in most of Afghanistan, so I used the wood filler to break up the sand.
Once I'd done my wood filler patches, I spread out FULL STRENGTH WHITE GLUE onto a stretch of contour surface, then I hand-placed several small and medium size PEBBLES where I though they would look good, and only then did I pour rough sand (actually HOME DEPOT "SOIL EROSION" ballast, an incredible bargain at something like $3.00 for a 10-pound bag).
I also made sure to use glue on a few spots along the slopes/edges of the contours, where I thought it would look good for rocks and sand to be scattered and link together the rocks and sand on the upper and lower contours.
Once everything had tried and I'd reclaimed all the loose ballast, I applied a coat of Woodland Scenics "Scenic Cement" -- which is nothing more than watered-down White Glue -- to bond everything together with one last coat of adhesive.
After that dried, I spray-painted my base-coat of FLAT BLACK, and then commenced DRY-BRUSHING.
Whew!!!
To be honest, the carving, spackling and gluing is somewhat interminable, but it all leads up to the PAINTING, which goes really, really fast, and which I personally really enjoy.
That does it for the step-by-step narration -- now on to the visual aids...

