After painting the Vauban fortress for my friend I was very happy with it, but one thing stuck in my mind...
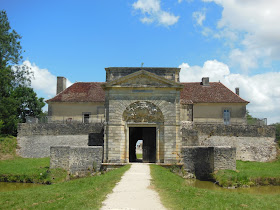
I had looked at a lot of photos and illustrations of Vauban forts and most of them seemed to have more elaborate front gates than the one for my friend's fort, which was just an identical wall section with an entry added to the middle, as seen here:
There was nothing wrong with it of course, and I had spiced it up a bit with the "heraldic door" but it still struck me as a bit too modest for the finished fortress.
Here's some pics of the gates that left me feeling this way:
After pondering this conundrum for a short time, I remembered a model building sitting in my display cabinet...
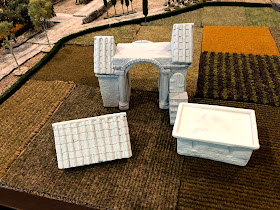
It was a Kobblestone archway from their Mediterranean range. Kobblestone was an interesting company that made some very cool, stylized 28mm buildings, but sadly seems to have suspended operations. Their website is still up and you can visit it to see some nice pics of the models in their various ranges at this LINK: https://www.kobblestone.ca/index.htm
I set the archway up alongside the Vauban walls and it matched up well size-wise. Then I remembered I still had a box with the rest of the Kobblestone Mediterranean village set in it, including a 2nd, more elaborate, archway. The strangest part of this is that the Kobblestone Mediterranean Village actually belongs to the same friend of mine, and he sent it to me to paint for him long ago, which I'm sorry to admit I never got around to doing. On the bright side, if I had done so, his Vauban fort would not have upgraded its entrance!
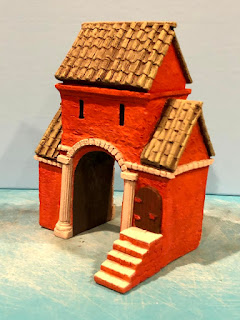
It turned out this 2nd Kobblestone Archway had the option of being built with a second story. I took some pics and sent them to my friend the owner and asked him if he'd rather have the one or two-story version...
It was a close call but he decided he wanted the two-story version. It had some gaps between the assembled upper story pieces but I was pretty confident I could fill them with a combo of balsa wood and some wood filler. I also trimmed a piece of stone molding off the side wall in order to allow the gate to sit flush with the end of the wall next to it. Below are a lot of pics, including my duplication of the heraldic door for this larger gateway:
The steps leading up to the door had been glued on by Kobblestone a bit off-kilter, so I broke it off and re-glued it, lining it up so the end of the gatehouse could sit flush against the end of the adjacent wall section...
Having been very happy with the "heraldic" door paint job, I decided to do the same again for this much larger arched door. First on cardboard using magic marker, and then with balsa wood and paint...
I talked to my friend about roof color and suggested 3 choices:
1. RED (really more of a pale reddish-brown) for a terra-cotta roof;
2. GREY for a SLATE roof;
3. GREEN for a COPPER roof.
He really liked the idea of a green copper roof, so that's what I did, and I think it was a good choice. I used Delta Ceramcoat WEDGEWOOD GREEN...
Since the reverse side of this door would be visible, I decided to build it also. I cut one solid piece of balsa to size and then added some details...
Finally after I was happy with both side of the door I glued the front & back sides together...
EDITED - Sunday Dec. 1st, 2019:
BELATED HAPPY THANKSGIVING!!!
I put up links to this new gatehouse post on TMP and LAF.
Overall this Vauban project has garnered less attention and fewer comments than I thought it might, but the gatehouse got a question RE: its darker color, if that was intentional or if I was still in the process of darkening it to be a closer match with the rest of the fort...
Sigh.
It was a bit of a bummer at first but the commenter was absolutely correct! I had noticed the relative darkness of the gatehouse despite the fact that it was painted with what I believe was the exact same paints as all the other pieces before it! I think this was due to its rougher texture, which gave it built-in shadows, compared to the smooth finish of the brickwork on all the Ian Weekley designed pieces. I had considered doing something about this but as the gatehouse had already gone through the somewhat involved weathering wash process and then been spray sealed, I put the issue out of my mind...
Until I read that comment/question on LAF and decided to take another shot at dealing with it.
I tested another coat on a side wall and the building took the paint without any trouble. After that I went over the entire gatehouse with 2 lighter shades of color. In the end it's still a bit darker than the rest of the fort, but it's definitely lighter and I think a closer match. And my expat friend in a foreign land is happy with it, which is really all that counts!
Here's a few pics:
I have to thank FifteensAway from the Lead Adventure Forum, who I believe also lives here in California, albeit in the Northern reaches rather than the Southern ones like myself, for posting his question, which pushed me to do just a little bit more work on this project. Thank you, sir!


What a brilliant end to a project that I have thoroughly enjoyed.
ReplyDeleteThe first gate worked very well but the revised gateway is splendid and much more appropriate!
ReplyDeleteBest Iain
Thanks Michael and thank you, Iain! True, it took me 5 months to reply to your comments, but I just solved my Blogger problem and am once again able to comment on my own blog as well as the blogs of other! A happy turn of events indeed for me! Iain, glad you liked the "luxury" gatehouse! It was a lot of added work but I was very happy with how it turned out.
ReplyDeleteYou’re attention to detail is astounding! Another beautiful build and paint job!!
ReplyDeleteCheers,
Sgt G