Back in September I hit a bit of "hobby block" -- if there is such a thing -- while in the ongoing midst of working on one interminably-large, rocky wood-chip hill.
I decided I needed a more modest project, which I could see through to completion in a far shorter and sweeter span of time. So -- inspired by Pat over at his splendid "Wargaming with Silverwhistle" blog (click HERE to visit and see his truly spectacular terrain and figure work) and also by a particular post by the very talented Michael Awdry at his fantastic "28mm Victorian Wargaming" blog (click HERE to visit) -- I decided to make some ROCKY TERRAIN PIECES, for use on my Afghan/North-West Frontier battlefields.
I actually have a decent-size collection of nice rocky terrain, but they don't at all match the look of the rocky hills I've been building for the past year, so I wanted to build some matching rocky terrain out of the same wood-chips I've been using for hills.
I wanted things to go fast and easy, so I used a material I could cut with scissors for the bases of the terrain pieces, rather than something I'd have to saw or cut with a utility knife: a 12"x12" piece of inexpensive adhesive vinyl floor tile. I'd bought some pieces years ago at Home Depot to use as "areas" for rocky terrain, since they had a "rocky" looking surface. But having upgraded the quality of my Afghan terrain over the past couple of years, I knew I'd never use them for that again, so they were fair game to be cut down to size as bases for my new-&-improved rocky terrain pieces...


As you can see it was a very simple process: lay out a few wood-chips, outline their general shape on the base, cut out with scissors, then glue down with HOT GLUE, and use the same hot glue to attach any additional wood-chips.
Add some Elmer's Wood Filler to fill any gaps...


Finally spread some White Glue on the exposed surface of the base and covered with Home Depot "Soil Erosion" ballast (a lower-cost alternative to model railroad ballast with rougher and more variably-sized grain than sand)...


Add some Woodland Scenics "SCENIC CEMENT" to the base to help keep ballast and pebbles glued solidly down...


Spray-paint a base-coat of BLACK...


Dry-brush the base area with my usual trio of BROWN, HONEYCOMB (Delta Ceramcoat's caramel color), and SANDSTONE (Delta Ceramcoat's pale khaki)...


And dry-brush the ROCKS themselves with BROWN, and then my drab mix of caramel and black for the stone color, highlighted by MUDSTONE (Delta Ceramcoat's darker khaki) and SANDSTONE...


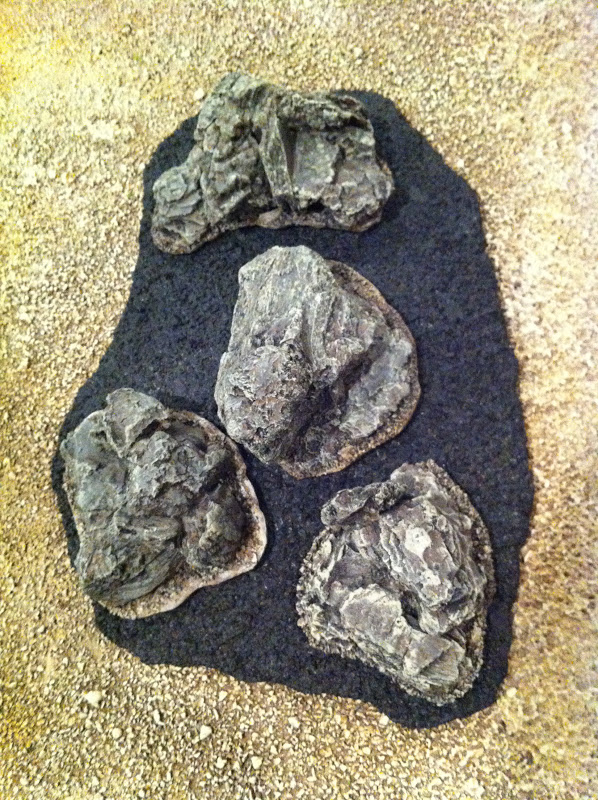
The finished paint-job on the rocks...


Some pics of the newly-painted rocks in action...


Next I needed to define the "rocky terrain area" for use in an actual game of The Sword And The Flame, so I cut some roughly 8"x11" bases out of Evergreen black plastic sheets...


After looking at my first completed "area" base for a while, I realized it was way too "regular" to use for an area meant to contain a natural, as opposed to man-made, piece of terrain, so I went back to work with the scissors, and tried for a more natural/irregular shape on this and the 3 other pieces I made...


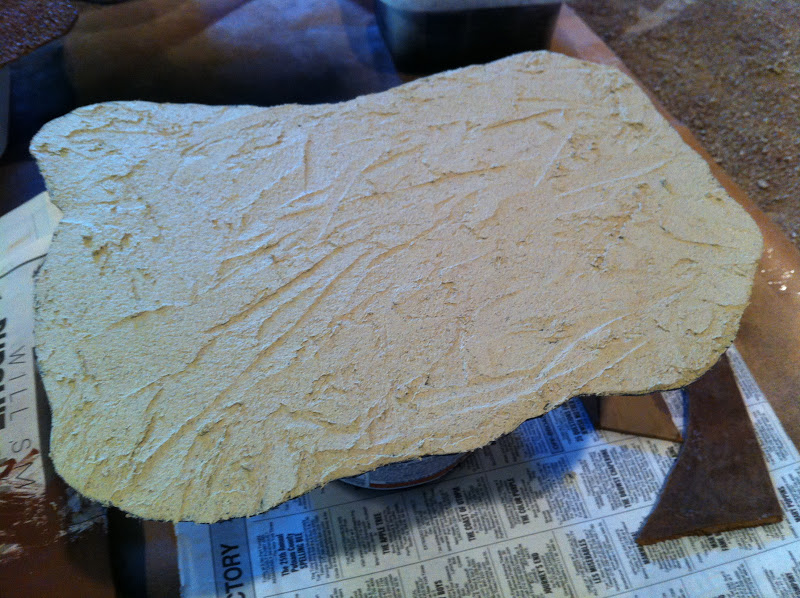
After some frustration in waiting for the Soil Erosion ballast and pebbles to competely dry atop the bare plastic, I decided on my next pass to cover the entire base with Wood Filler, which I knew from experience would provide a more absorbant surface for the White Glue and Scenic Cement...


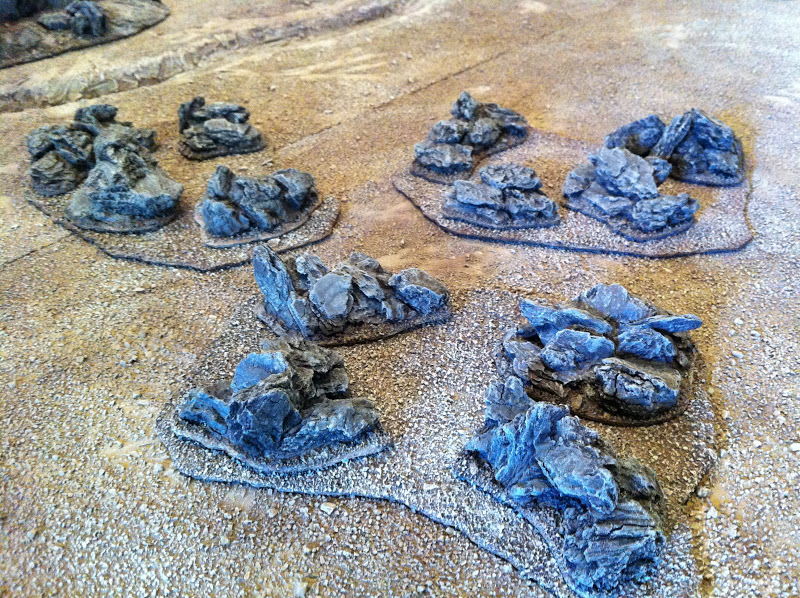


Separate and apart from their use marking "rocky terrain" in games, I tried laying the rocky terrain pieces out atop my hills, to give them just a little bit of extra "rock"-itude, and I think they look pretty good, and blend in pretty well with the pre-existing rocky hills...


In answer to some questions on TMP, I'm posting a few more pics of the ingredients for these terrain pieces...
First up is the Home Depot "Soil Erosion". That's all it was called at the Home Depot on Sherman Way in the North Hollywood neighborhood of the San Fernando Valley. I believe they stock it on a seasonal basis for use to prevent mudslides, etc., in what passes for the "rainy season" here in Los Angeles. I don't know if it's kept in stock anywhere else.
It's sold in 5lbs. or 10lbs. sacks, and I first came across them back in the Spring of 2010, I believe I bought five sacks. They only cost something like $3.00 per bag, and I knew I was going to need a lot of the stuff over the long haul, so to speak. Even after using it on my 6 Maiwand Day terrain boards, my 5 rocky woodchip hills, a bunch of terrain pieces like rocks, trees, waterways, etc., plus using it to terrain bases for at least a couple of hundred miniatures, I've still got nearly 3 bags left. Which is good, since I'll need it for the additional terrain boards I hope to build in the near future, such as a board for the Logar River and one for the Kabul River, for the battle of Charasiab, plus a couple more plain flat boards, to just lay out hills and various other terrain on top of.
A sample sack:

And a view of the contents:

Next up is an adhesive vinyl floor tile like the one I used to cut the bases for the individual rocky terrain pieces (I believe they cost about .70 cents apiece):

I used the "sticky" black underside face-up to support the wood-chips, which left the "stone" surface upside-down, facing my tabletop.
Here's a couple of pictures of the Evergreen Scale Models sheet styrene I used for the "terrain area" bases. It comes in a variety of thicknesses. The thinner sizes have 4 sheets in a pack, but the 1mm thick size, which I used, only has 3. So far I've used 2 out of the 3 sheets, turning each into 2 "area" bases, all roughly 8" x 10.5". This item is far more expensive than everything else here, costing jusrt over $12.00 for the pack of three styrene sheets, which works out to $4.00/per sheet, and $2.00/per "terrain area" base...

