For the past two years, most of my hobby time has been spent preparing the tabletop terrain for a miniature refight of the battle of Charasiab, fought on October 6th, 1879, just North of the Afghan town of Charasiab (which translates to "Four Waterwheels" in Farsi/Persian) located 7 or 8 miles South of the Afghan capital of Kabul.
First up was building the varous large hills needed for the fight. So far I've built 7 of those (yikes!). One of them is not quite up to snuff, and may be replaced with a better version of itself before I am done.
When I first started prepping this terrain, I would sometimes find myself perplexed by the various different versions of the hills laid out in different maps of the battle. For instance, there is this map:

...and this map:

Similar, but with some stark differences when it came to area between the Western hill and the massive central hills/mountain blocking the way North to Kabul.
Then I discovered GOOGLE EARTH. Of course, Google Earth was created and continues to be principally used for navigating the highways and byways of our contemporary world, and I admit to having used it for that exact purpose many times, here in the USA, and overseas in Asia, Europe, and the Middle-East. But... to be honest, navigating streets and freeways is not what Google Earth means to me. What Google Earth means to me, is the ability to have found what I believe is a better understanding of the terrain fought over by Anglo-Indian and Afghan armies at Charasiab, some 130-odd years ago.
Before getting into the Charsiab terrain details which Google Earth revealed to me, here are a few pics of the surrounding countryside (uploaded to Google Earth in the vicinity of Charasiab) which helped me get a better feel for the surroundings...
Three pics of the "Charasayab Canal", giving a good sense of where the Town's name of "Four Waterwheels" came from:


View of the large hills to the North, from just East of Charasiab itself:

Another view from the South, looking North, towards the imposing hills:

The swamp on the Western bank of the Logar River, just a bit South of the Conical Hills:

The road through the Sang i'Nawishta Gorge, heading North to Kabul, running just West of the Logar River:

The Kabul River where it skirts the West Spur of the West Hill...

Luckily for me, the ground between Charasiab and Kabul has not changed dramatically over the intervening years. By observing it via Google Earth, I believe I came to an understand the reason behind the oddly shifting nature of the size and shape of the hills to the North of the town. My understanding was confirmed when I gpt my hands on a copy of Lord Roberts' autobiography/memoir, which includes a chapter on the battle, which itself includes the following description of the terrain:
The Afghan position formed the arc of a circle, extending from the sang-i-nawishta gorge to the heights above Chardeh. Both sides of the gorge were occupied by the enemy, as was a semi-detached hill to the south of it, and sixteen guns were observed in position. The line they had taken up occupied nearly three miles of country; and their main position was the ridge, which, close to the gorge, rose 1,000 feet above the plain, running up at its western extremity to a peak 2,200 feet high. Thence the line stretched along the edge of some lower heights to a rugged hill, the summit of which was about 1,800 feet above Charasia. In front of this formidable position were a succession of sandy hills, forming a series of easily defensible posts, and at the foot of these hills ran a bare stony belt, sloping down to the cultivated land surrounding Charasia and the hamlet of Khairabad.
Note the term: "...a succession of sandy hills, forming a series of easily defensible posts".
The reason for the shifting representation on the maps was that some of them -- I assume the secondarily drafted ones, which were drawn based upon primary ones drawn at the scene, were treating the sandy hills as extenuations of the larger, taller and more rugged hills.
My Google Earth map of the battlefield:

The aforementioned low, sandy hills:

Once I understood this, I was happy, because I had solved a problem. I now was certain I knew the proper outlines for all the larger hills, as well as the succession of smaller, sandy ones. But I was also faced with a bit of a dilemma: how to represent these smaller, lesser, hills? My solution would have to combine playability -- they'd be useless if my single-based figures could not move and fight across them -- with some degree of aesthetic quality, since I have no interest in buiding something for my table that won't look at least pretty good. There was also a third requirement: even though I like my terrain to look good, I also like for it to be as versatile as possible. So I wouldn't be building an expansive collection of low hills on a single large baseboard of Masonite (MDF), thin plywood, or modeller's plasticard, I'd be building a collection of individual hills which in the future could be split up, rearranged, regrouped, etc., in order to best serve an endless variety of potential tabletop scenarios.
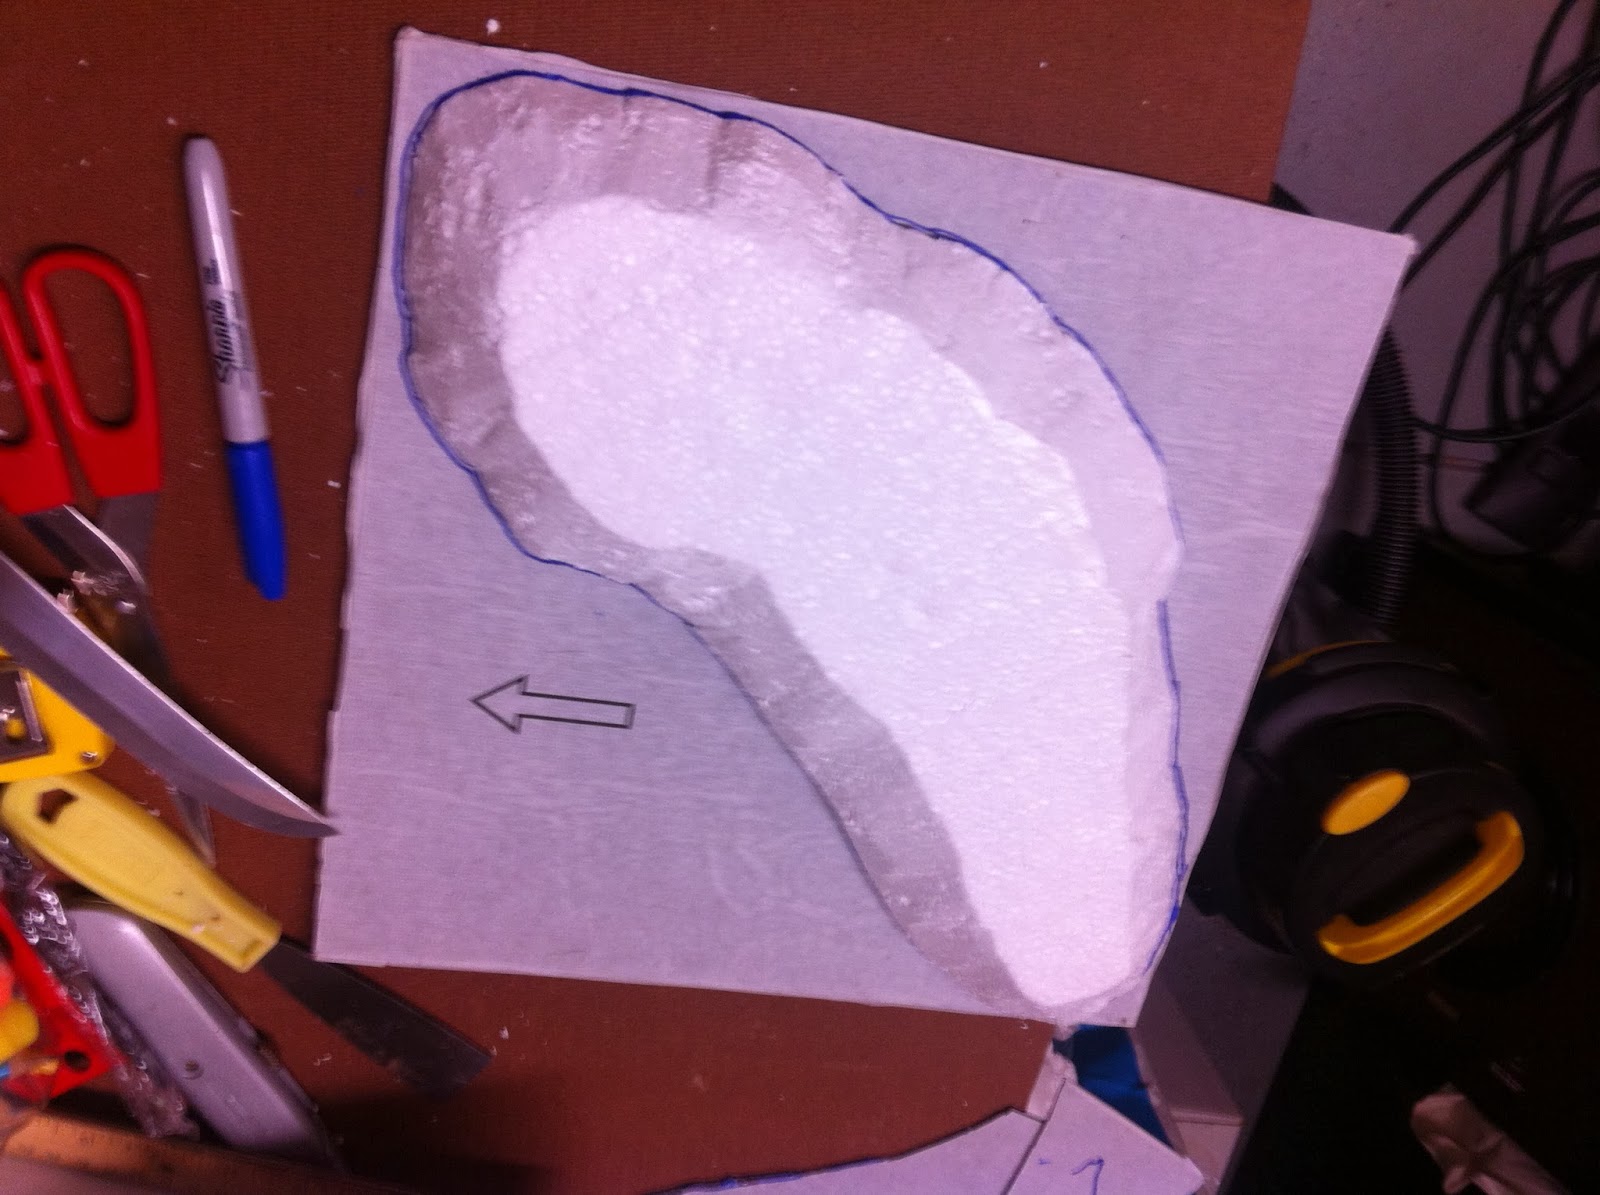
After measuring the ground covered by the real low, sandy hills and translating it into my own ground scale (1"= 50 yards), I decided I would need 6 hills, each cut out from an inexpensive 1'x1' vinyl floor tile. I chose these tiles because (1) they are VERY CHEAP (at Home Depot), and (2) they can be easily cut with a strong pair of scissors. My larger, rocky "wood-chip" hills always use Masonite (MDF for those of you in the UK!) baseboards, which require sawing and/or strenuous use of a utility knife. I am actually a halfway decent woodworker, mostly thanks to absorbing some skill by osmosis from my recently-deceased, incredibly-handy father (of Blessed Memory), but I don't have a real wood-shop in my garage, and the time required to set up and work safely is always a pain. With these pieces fitting neatly inside a 12"x12" footprint, it seemed a win-win to base them on vinyl floor tile.
After measuring the ground covered by the real low, sandy hills and translating it into my own ground scale (1"= 50 yards), I decided I would need 6 hills, each cut out from an inexpensive 1'x1' vinyl floor tile. I chose these tiles because (1) they are VERY CHEAP (at Home Depot), and (2) they can be easily cut with a strong pair of scissors. My larger, rocky "wood-chip" hills always use Masonite (MDF for those of you in the UK!) baseboards, which require sawing and/or strenuous use of a utility knife. I am actually a halfway decent woodworker, mostly thanks to absorbing some skill by osmosis from my recently-deceased, incredibly-handy father (of Blessed Memory), but I don't have a real wood-shop in my garage, and the time required to set up and work safely is always a pain. With these pieces fitting neatly inside a 12"x12" footprint, it seemed a win-win to base them on vinyl floor tile.
But the nice tile bases not withstanding, my first attempt to build a low, sandy hill did not turn out all that well. I actually started out building a two-contour low hill, which I later decided was not going to work for me. Here's what it looked like:


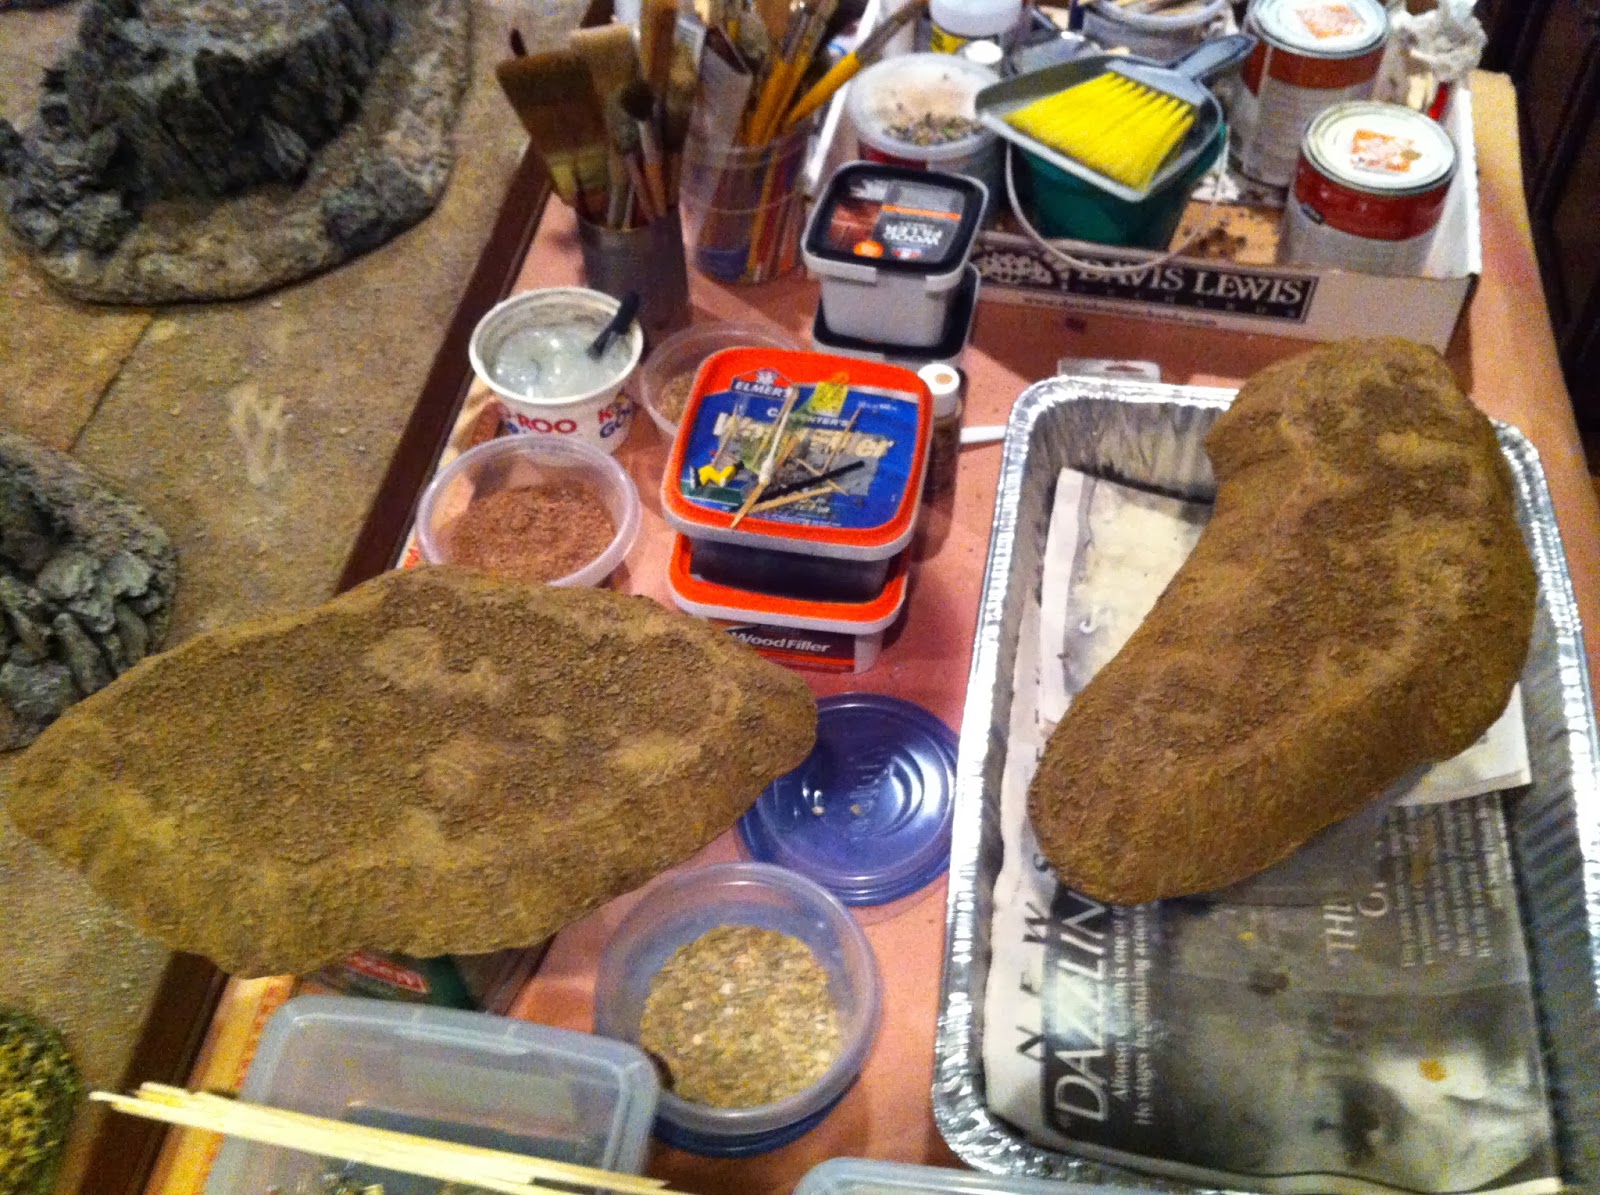
Not bad, but not good enough either. The somewhat stylized and unnatural effect of the stepped contours did not appeal to me. I realized I would be better off making each hill a single contour affair. I also realized I could at least slightly counteract the unnatural uniformity of multiple one contour hills by making them out of various different gauges of styrofoam. I also decided that -- instead of using the super-fast and easy "Durham's Water Putty" finish I had tried out on this test piece (it took me LESS THAN 20 MINUTES to texture the ENTIRE HILL WITH THAT STUFF!!!), I would use the exact same -- far more painstakingly time-consuming -- combination of Elmer's Wood Filler and White Glued sand and pebbles which I used for the ground cover of my terrain boards, and for all my larger hills. That way these smaller hills, while modest, would seamlessly match all the rest of my terrain.
I decided to use 3 different thicknesses of foam: 1/2", 1", and 1-1/2", and to make 2 contours from each thickness. I hoped that would provide enough variety. Though Charasiab is too large a battle to take it into account, in smaller games it may be useful to bring the differences in height of the various contours into play for purposes of advantage or disadvantage for melee and/or firing.
Here's a bunch of pics showing the relatively simple building, texturing/terraining, and painting process for the 6 "low, sandy hills"...


At this point I realized 6 would be the final number of low hills needed for this layout. As I already had 4 at various states of completion, I pressed 2 green hills into service as temporary stand-ins and laid out them out in close approximation of the final arrangement...

NOTE: as usual, my arid/desert ground-cover color scheme is as follows:
(1) BASECOAT dark brown
(2) HEAVY DRY-BRUSH caramel brown
(3) LIGHT DRY-BRUSH sandstone


NOTE: in my experience, the best choice of knife for cutting styrofoam -- especially from thicker sheets (1" or more in thickness) -- is a simple straight-edged kitchen knife, as shown above.