Made a decent push towards completing the last big hill for my Charasiab layout over the month of August, which just ended. I have finished the "hot-glue" phase and begun the "putty" phase, using Elmer's Wood Filler as usual. After this is all done will come the "texturing" phase of gluing down sand and pebbles over much of the contour tops and a small portion of their slopes.
This hill is something of a behemoth, at least for me. Its base is approximately 29" x 19". Working on it reminds me of a great line -- at least IMHO -- of Martin Sheen's Captain Willard towards the start of Apocalypse Now:
WILLARD (v.o.)
"It was a real choice mission, and when it was over, I'd never want another."
After this hill is all done, I still have a bunch of other terrain pieces to make for the layout (see previous blog entry), so I may simply not get done in time for the fast-approaching October 6th anniversary of the 1879 battle. If that's the case I may play anyway, on an unfinished/roughly improvised version of the layout... or I may just wait until I'm all done to convene the players, lay out the troops, and start rolling dice. Either way, the game will happen sooner or later!
One last note: this post does not include any pics of the finished product. In the past I've waited to post anything about building terrain pieces until after I'd completed them, so you could get the full story, and see what all the time and effort was meant to accomplish. I've decided to break with tradition, and put these pics up now, even though they end with a "Work-In-Progress". I sincerely hope that doesn't disappoint anyone reading this post.
With that being said, here are some pics of the building process. It's simple and straight-forward, though somewhat time-consuming. Kind of like putting a puzzle together, if there was no picture on the puzzle box. After cutting the Masonite/MDF baseboard and the base contour of insulation foam (in this case 1.5" thick), the main tool required is a HOT GLUE GUN...
The combined base contour and board, laid in place atop the table...
Hot-gluing of woodchips, and filling-in with 2" tall styrofoam, begins...
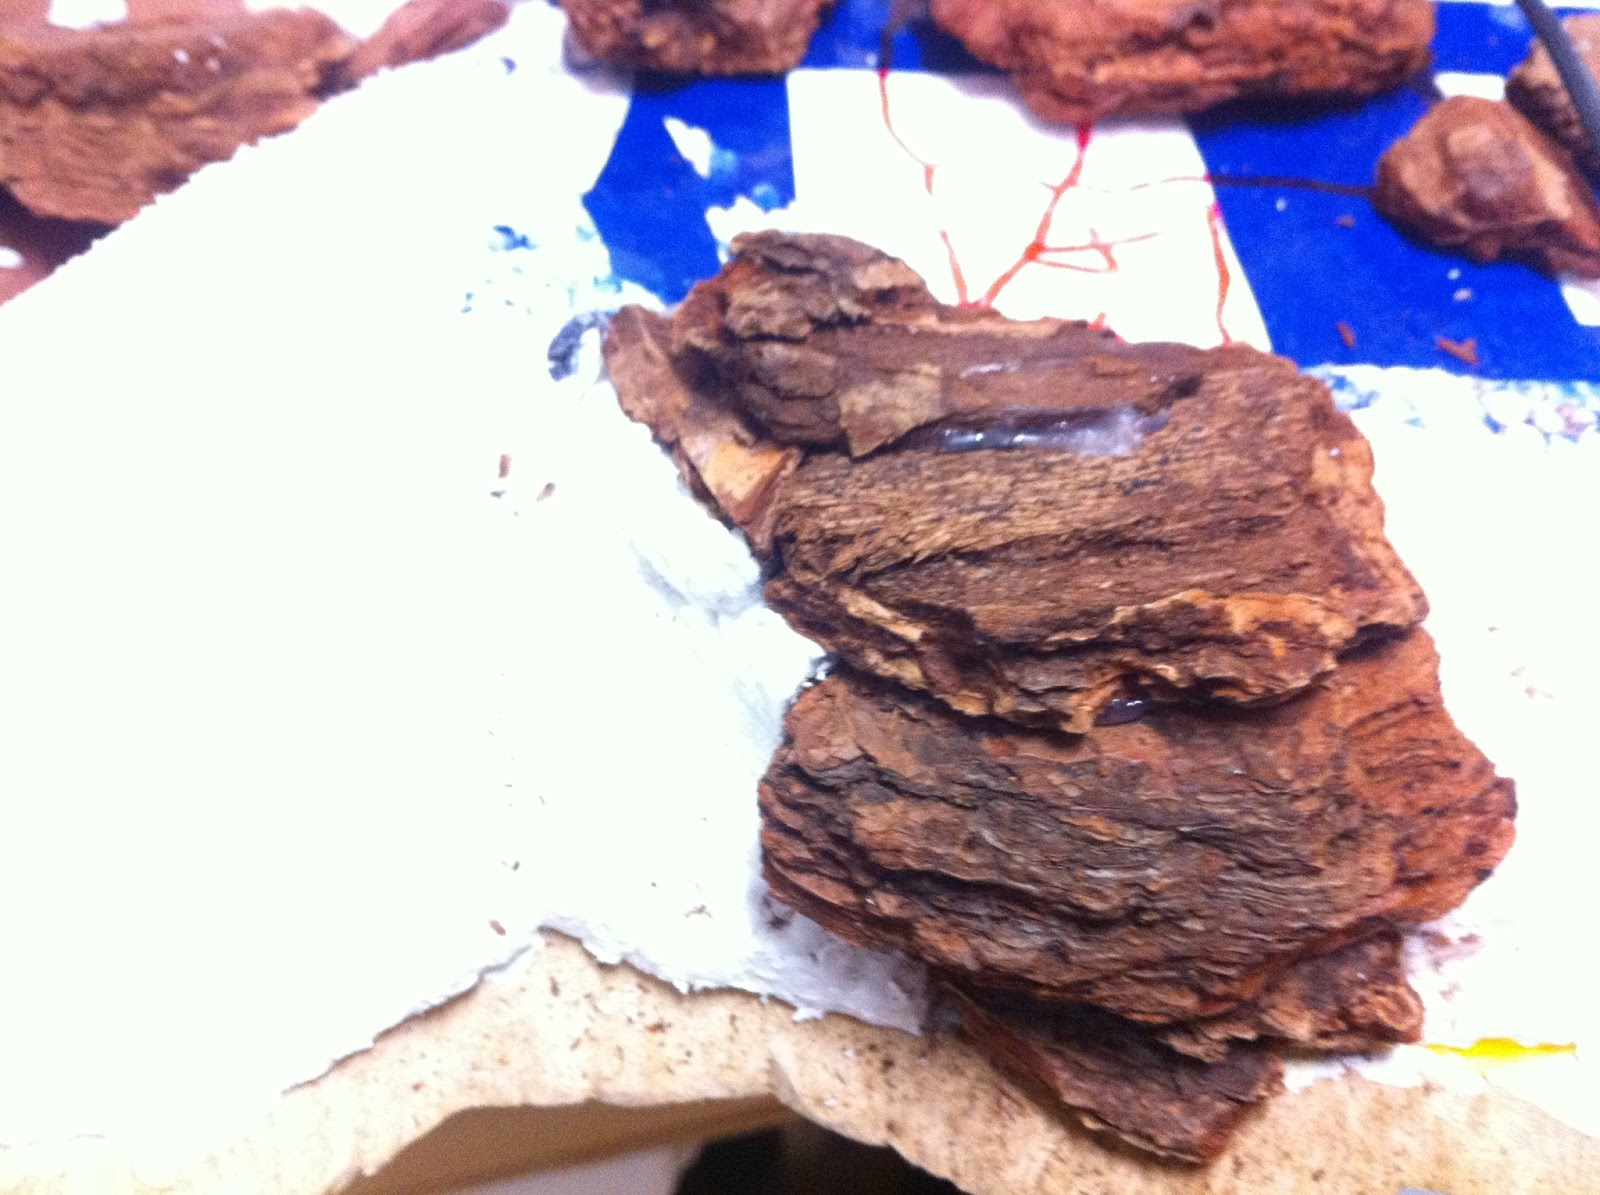
A detail I'd never tried before: a rocky overpass/underpass incorporated into the hill, inspired by a simply GARGANTUAN woodchip I pulled out of the size "large" bag...
I was concerned that despite looking good, it might not be that secure, more appropriate for a diorama than a piece of gaming terrain which in order to function properly must be rock solid and capable of standing up to use and even a bit of abuse by players.
But I'm happy to report that turned out not to be the case. By picking pieces that fit tightly together, it seems to have turned out surprisingly solid...
After looking at the section of hillside in the picture below, I decided it was just too much of a perfectly straight line...
So after some hemming and hawing, I sliced off the woodchips and adjusted the foam backing by cutting into it a bit, and made it slightly more irregular. It was a little nerve-wracking at the start, but I was happy to have spent the extra time once I finished the improved version...
...visible here:
With the first rocky elevation contour complete, I took the hill from my garage, where I do all the foam carving and hot-gluing, to my office, to set it down in its spot on the Charasiab table...
Then it was back to work on the second rocky elevation. For this, rather than piecing multiple pieces of foam together, I cut out a single tailor-made piece of foam, attached it with a combination of glue and toothpicks, then went to work hot-gluing woodchips to all its sides...
Having finished the second rocky contour, I put the hill back into its place on my table. It's a 9'x5' ping-pong table that's been sitting there for quite some time, since my partner and I started working on our latest project, which has been providing office space for us since this past June. My office served as a hardcore work space for my partner and I, but since we've had this gig, I've been able to leave the table in place.
The hill with its second rocky contour looked pretty good to me...
Now it was time to do what I'd never done before, but been looking forward to for some time: build a THIRD rocky elevation. As with the second elevation, because it was so relatively small, I began the process by cutting out a single piece of styrofoam for the purpose, rather than piecing multiple pieces together...
A big issue I had at this point was that I'd been dreaming of building that third rocky contour IN THE MIDDLE OF THE ONE BELOW -- so as not to interefere with the movement of figures during a game by creating a "dead-end".
I tried and I tried... but there just wasn't quite enough space atop the second rocky contour to make this possible, so... after a lot of cursing (this is why it's good I do most of this work late at night when my wife and three children are all sound asleep) I accepted reality and decided to put one side of the third rocky contour flush against the rocks below. On the up side, this presented a 2-contour high sheer cliff, which is a detail I hadn't built into any of these hills before. If I want it to play with that kind of super-gritty terrain detail -- say for a very small scale skirmish -- this sort of thing could have an interesting impact on game-play, or maybe even in a more traditional larger scale battle.
From time to time I take a moment to set some figures up, just to keep my morale from coming up short...
The next issue I had -- there are always a few -- was when I realized that the lower quality foam I'd been using since finishing the base of the hill was going to be a problem when it came to building this final, uppermost -- smaller -- contour. It just can't stand up to the building process the way the higher quality insulation material can (here I'm only talking about the lesser "white" insulation material, not the REALLY good stuff that comes in blue and pink).
So... I started again from scratch, using a triple-layer of 1" thick better quality foam...
With the hill complete, it was back to the table to see how the "triple spire" rocky contours looked in context...
I've already begun PUTTYING, so hopefully it won't be too much longer before I'm back with another post, showing it all puttied, or puttied AND textured, or -- hope against hope!!! -- completely painted and ready for play.