As promised I'm back again, to deliver a detailed Work-In-Progress photo array showing how I built the last rocky wood-chip hill for my Charasiab layout...
1. Draw the outline of your hill on the styrofoam board. This particular hill was 1.5" thick, but most of my hills were built using 1" thick styrofoam. This one was 1.5" so it would fit better next to the big center hill at the North edge of my Battle of Charasiab terrain layout. In the pic below you can almost make out that the screen of my laptop is filled with the Google Earth view of the actual hills, which I used as a guide and tried to match as closely as possible...
2. Cut the hill's footprint out, using a bread knife from the kitchen...
Check how it fits into the layout...
...cool, it fits pretty well.
3. Draw another outline, 2" in from the edge, which will be the top the base contour...
4. Cut the slope...
Check that it fits again...
5. Trace around base of your foam base onto a piece of 1/4" Masonite...
6. Draw second outline about 1/4" outside the first line, so there will be enough room to slope the edge of the Masonite baseboard...
7. Cut along the outer line with a coping saw (or electric jigsaw if you have one!)...
Check the fit again, with newly-cut baseboard and the styrofoam contour...
8. Cut the space between the outer edge and the inner line on the Masonite baseboard into a slope and "rough it up". I use a small backsaw, which is good for keeping its blade edge straight while cutting at odd angles...
9. Use your creative judgement to mark a few spots along the slope to cut out, so the rocky cliffs (wood-chips) will run smack down to the base of the hill...
...and cut them out with the bread knife...
10. Glue the styrofoam contour down to the baseboard...
You can use liquid nails, or white glue (PVA), but for a while now I've been using RUBBER CEMENT with excellent results...
Brush it on evenly across the entire underside of the foam, making sure to cover all the edges, then set it down in place atop the Masonite baseboard...
...then WEIGH IT DOWN onto the boaseboard and/or CLAMP them together...
...and the next day it should be rock solid, like this:
11. Now comes the labor-intensive part: start choosing WOOD-CHIPS to HOT-GLUE into place, to create miniature versions of rocky hillsides and cliffs, using a Hot Glue Gun, like this...
Start by filling in the spaces you cut out where the rocks will descend all the way down to the base...
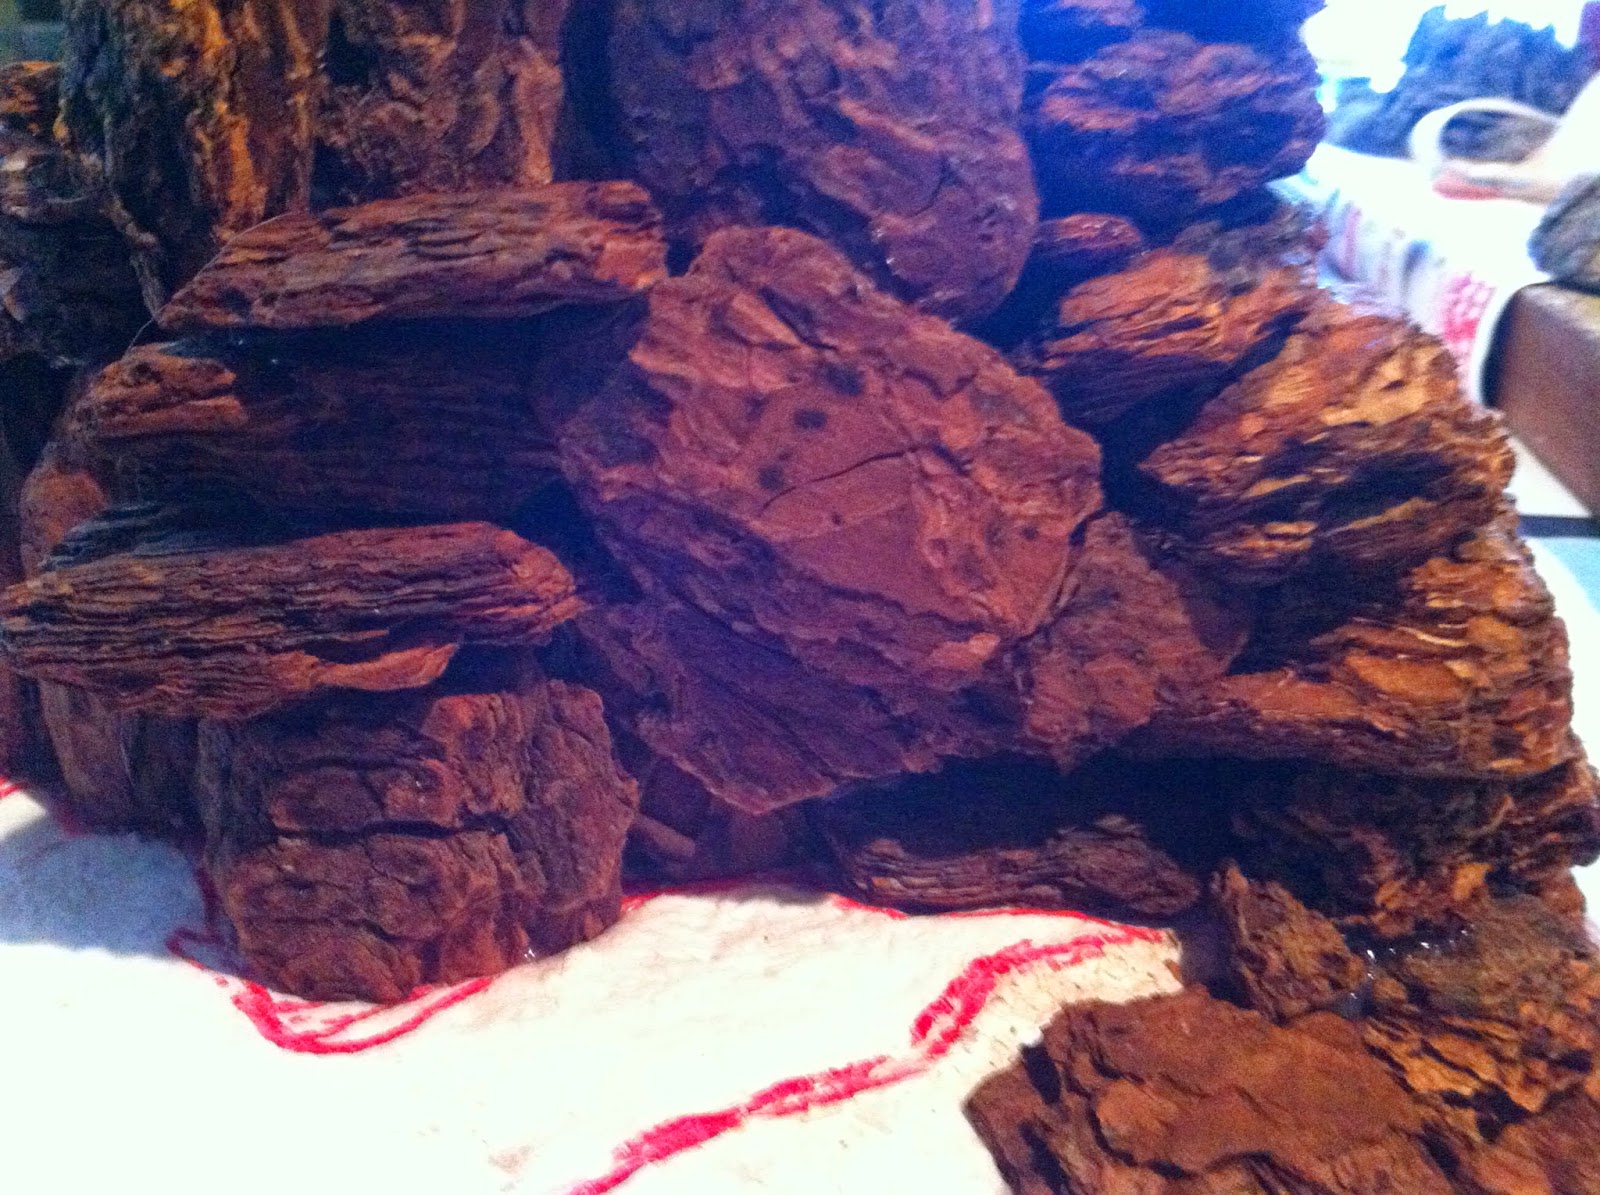
Building "pancake" stacks is easy, and can look very good...
The bigger challenge is finding pieces that work VERTICALLY, standing up side-by-side, like the ones on the upper right of this pic...
...and in the middle of this one:
Here's two "pancake" stacks with a line of "verticals" between them
You can also stack them vertically, like here:
Once you've got a deccent length of woodchips hot-glued to the foam base and each other, you need to fill in the space behind them with MORE STYROFOAM, cut to size and hot-glued into place...
Keep some figures around to check if horizontal surfaces are LEVEL enough for them to stand on...
(...and also to keep your hobbyist morale up!)
Here's a spot where I decided to make a sheer cliff from the base to the summit of the second contour...
...and here's where I started arranging some wood-chips into rocky "steps" leading from the base contour to the second contour...
Here you can see the steps coming together pretty well...
Alongside the steps here's a nice run of "vertical" -- standing -- wood-chips, arranged side-by-side...
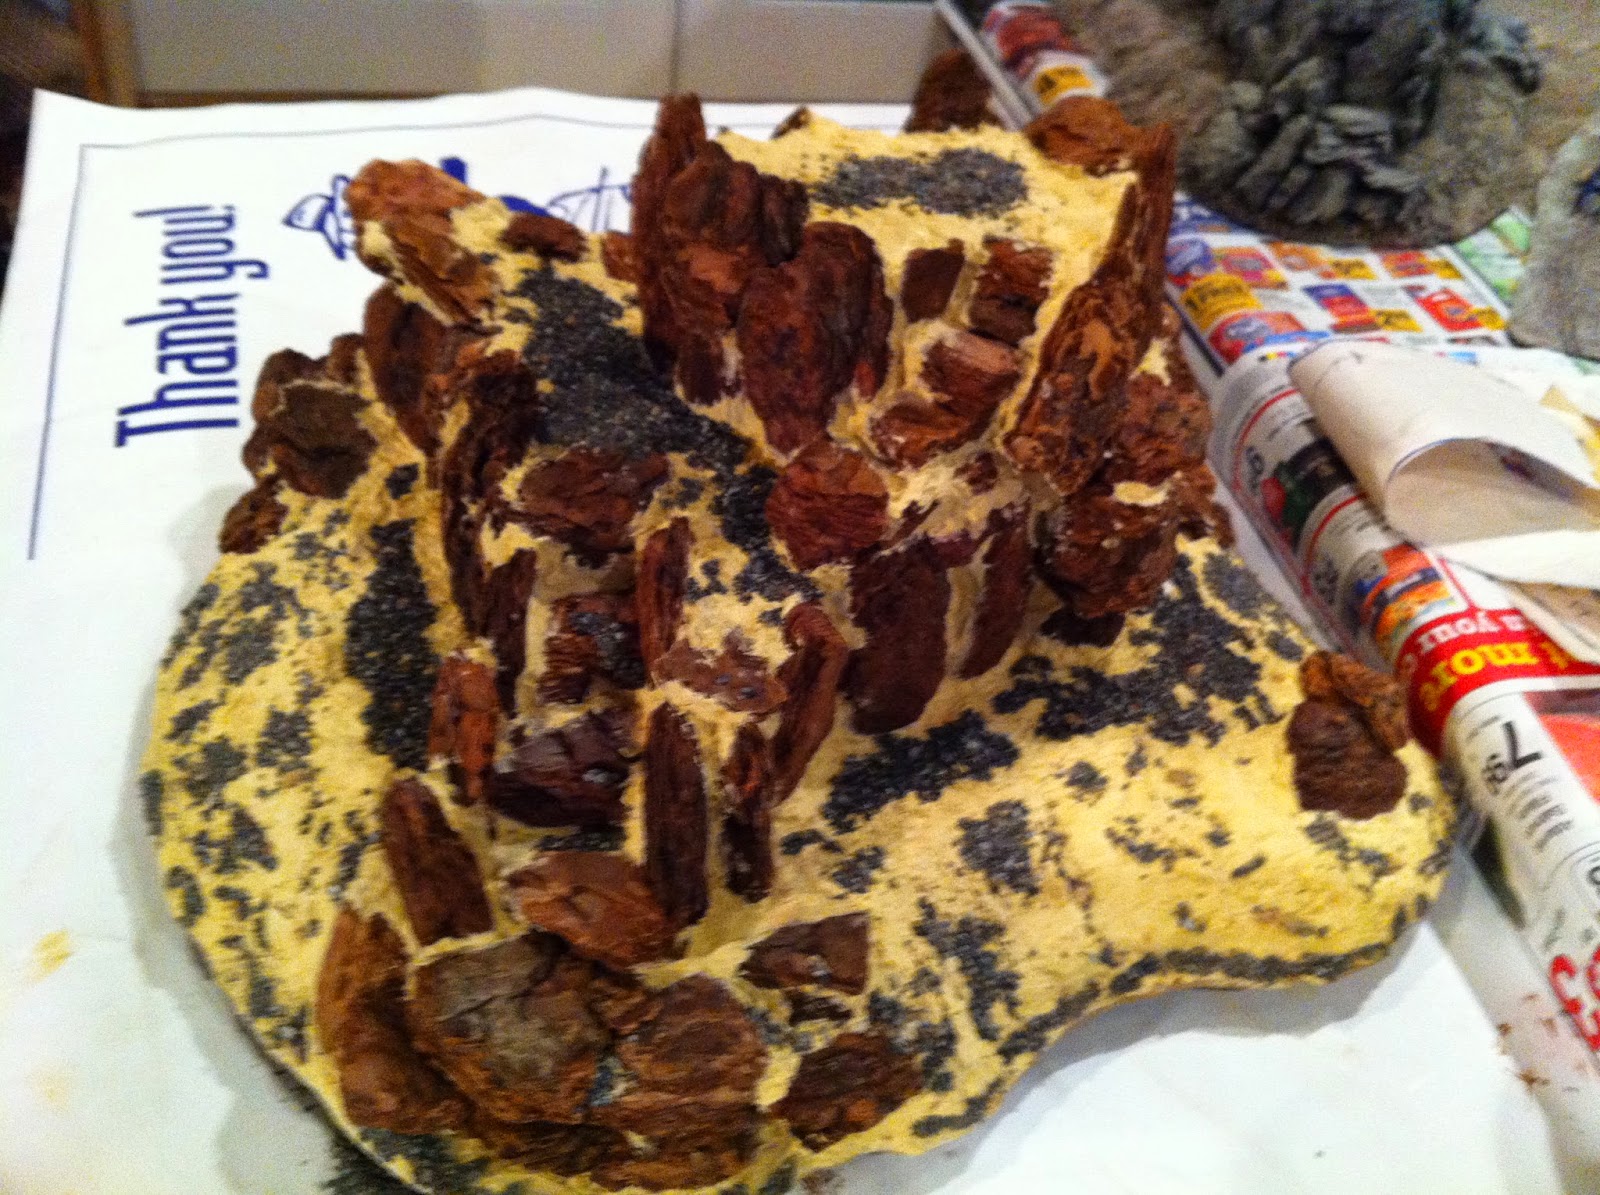
After finishing the first "rocky" contour, I put the hill back into place on my table, to see how the rock formations fit with the other hills already in place...
...then it's time to start adding the second rocky contour, built the same way.
It's important to leave enough clear space atop each contour for at least a single base-width and depth worth of your figures to stand...
...and when that's done, it's time to check how it fits with the nearby hills again...
Looks pretty good...
At this stage up close there will be A LOT OF LITTLE GAPS and some not-so-little spaces between some of the wood-chips, which is NO PROBLEM! We will be filling most of them with WOOD FILLER, but first some of the larger ones can be filled with smaller wood-chips, or pieces you cut or break off from them to fill a specific gap, like these...
This is a good time to survey the hill and see if there's anyplace you might want to add a wood-chip here or there, for pure visual effect, to make the imitation "rock formations" look more real.
Here's some examples on this hill...
Back in position to check how it fits in place on the tabletop before moving on to the next step...
Looks pretty good, but I still needed another morale boost to keep me going...
"I see the British and their Hindoo lackeys coming from over there!"
"Nonsense -- I see them coming from over here!"
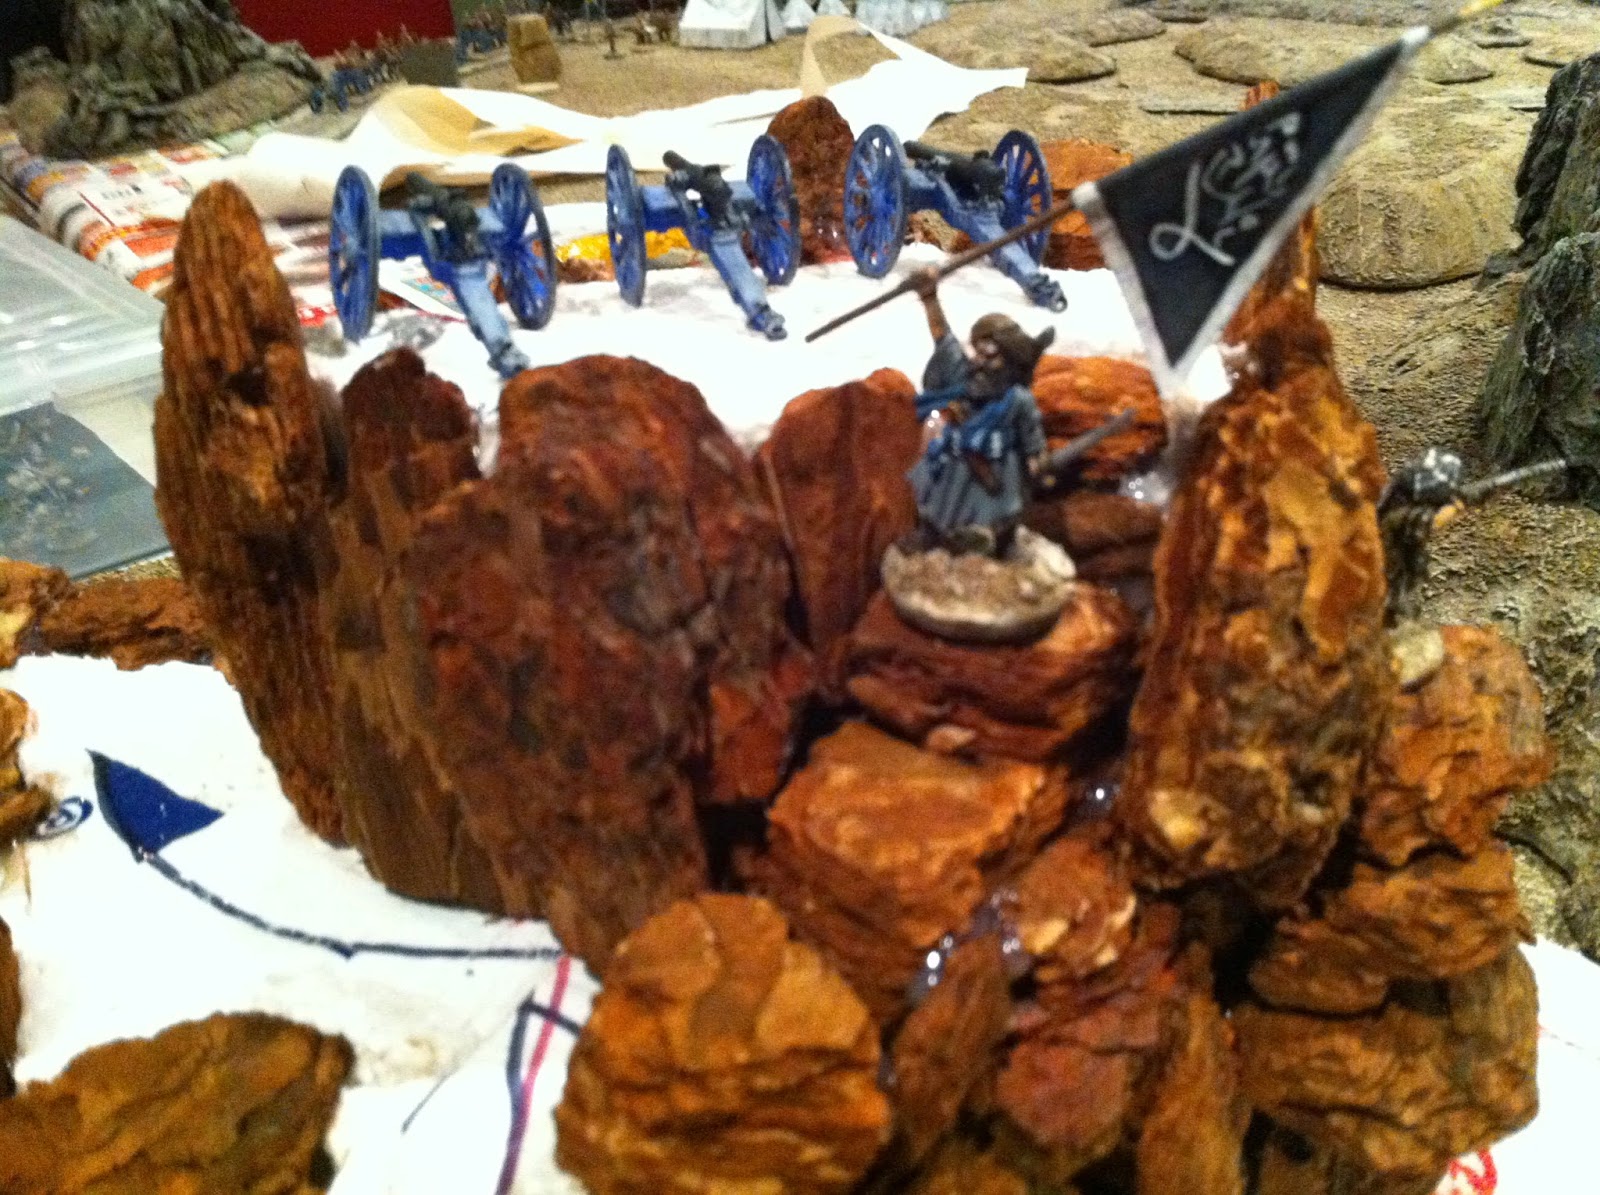
Here I'm checking to make sure there's enough room atop this hill for a battery of artillery the Afghan's placed there during the Battle of Charasiab...
Whew!!! Room enough for the guns. Good news for historical accuracy, bad news for the British.
A nice firing platform. It's good to build in some of these...
The rocky stariway filled with tribesmen "crowning the heights"...
Sniper's perch, c.1880...
Here's a spot that needed extra attention after I was done building the hill. I filled in a large gap between wood-chips with... another wood-chip:
Had to do the same thing here...
The objective is to make it look as natural as possible, albeit in a highly stylized way of course!
And finally we move onto the next step...
12. The puttying -- using Elmers Wood Filler to "fill in" gaps between the wood-chips.
NOTE: you DON'T HAVE TO FILL IN EVERY GAP!!!
In fact, it's better not to, because most of the smaller gaps look awesome, and just add to the sense of depth and realism of the rocky finish, by giving the impression that you could slip down in between the crags and disappear. But... others don't look so good, especially the ones where you can see bits of white STYROFOAM or small translucent globs of dry HOT-GLUE.
Also, by applying WOOD FILLER, we are greatly STRENGTHENING the overall structural integrity of our terrain piece, which I'm sure we can all agree is always a good thing for models that will end up being handled by gamers...
A nice "pancake" style cliff-face...
How it might have looked around 1880...
And back to the modern work-bench...
72nd Duke of Albany's Highlanders called in for morale-boosting duty...
Using wood filler to connect the wood-chips is complete, as seen here...
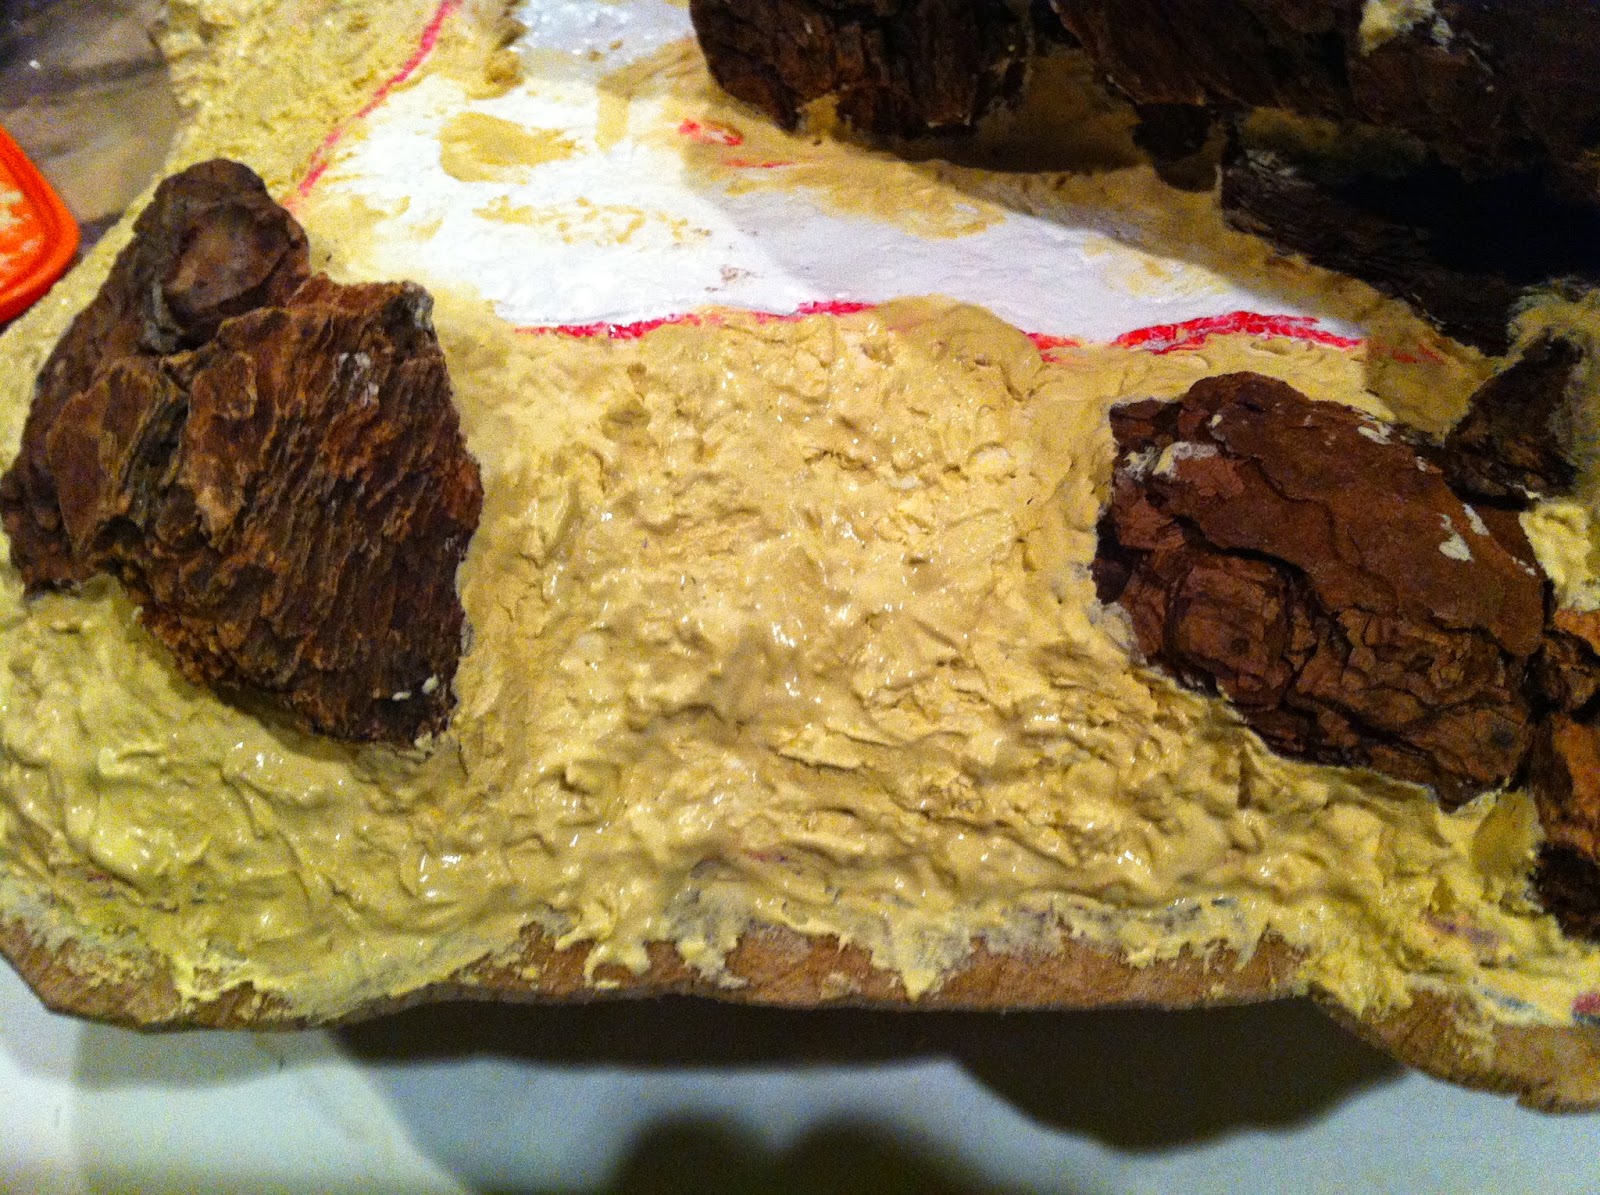
Which means it's time to load on more wood filler, this time over the EXPOSED STYROFOAM of the base contour SLOPE.
This serves the dual functions of adding a nice roughly natural TEXTURE, while coating the exposed foam for protection...
WHEW!!! Another big labor-intensive step completed. Which leads us to...
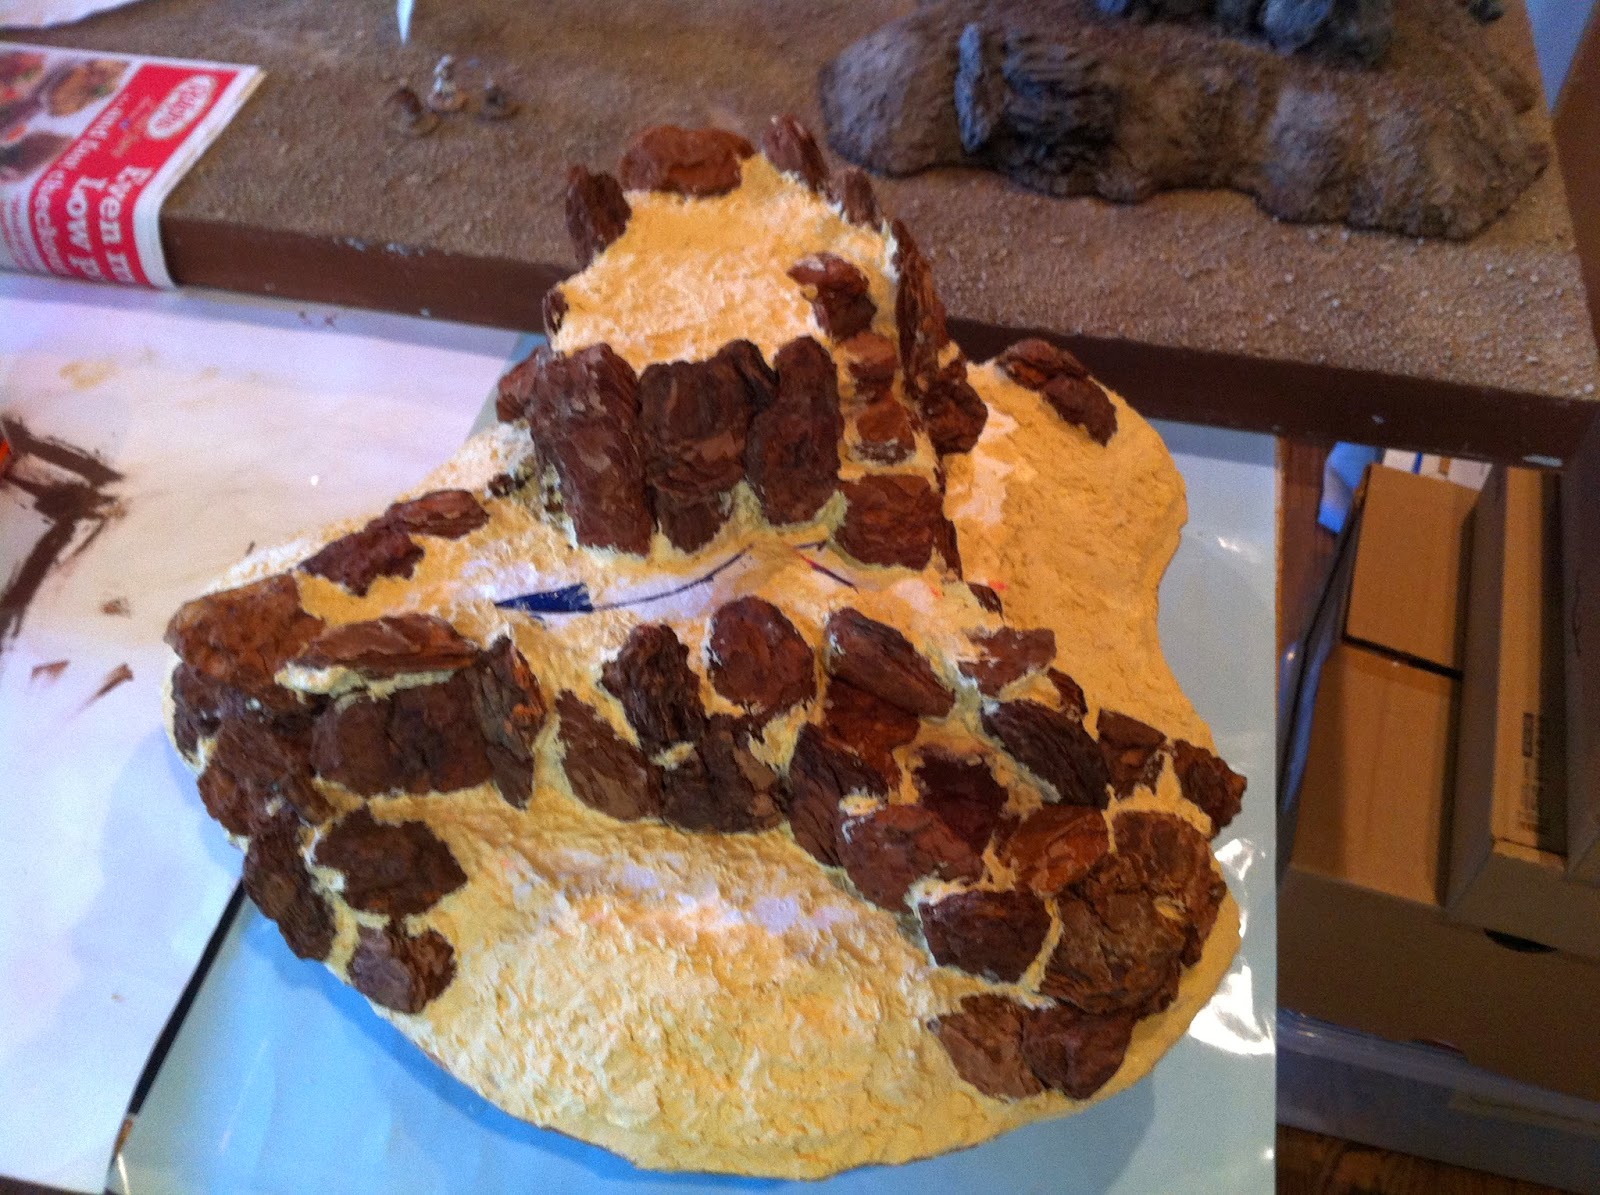
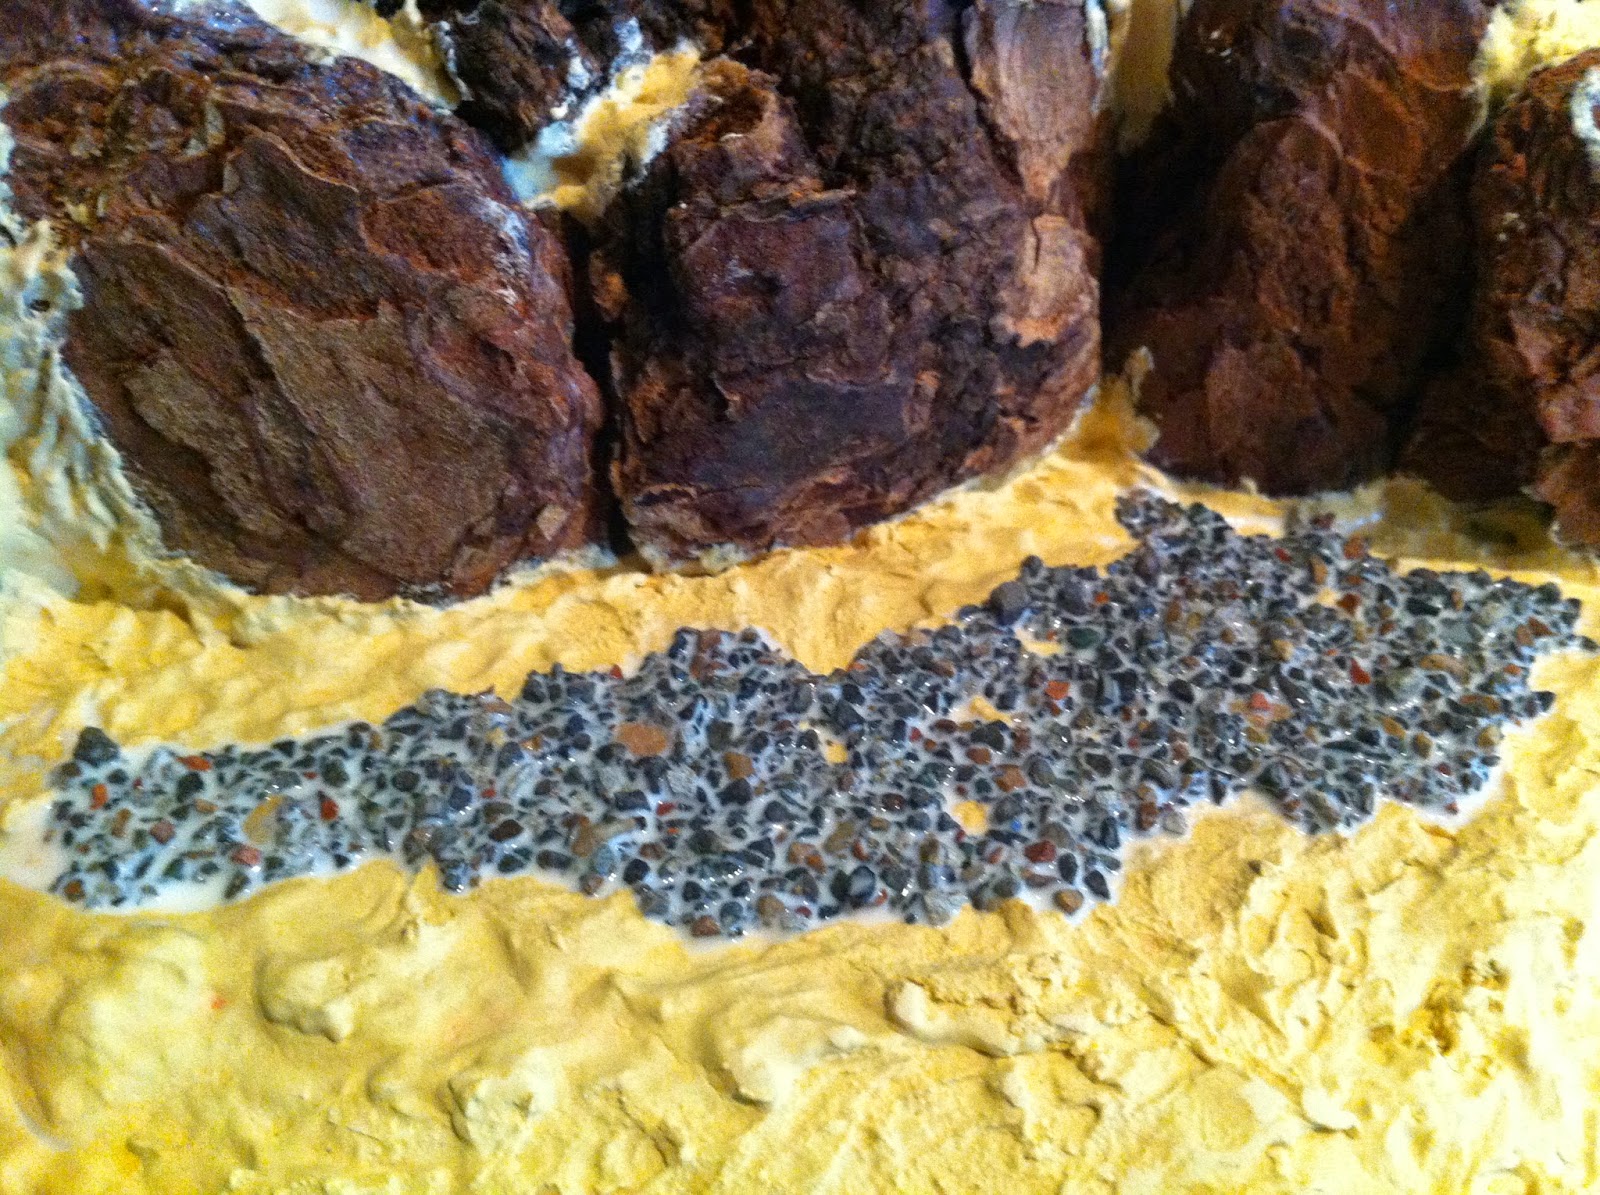
13. Time to add sand and pebbles to the areas not filled with rocky wood-chips. This really helps blend the hill in with my ground cover, which was made using the exact same sand and pebble materials.
I pour/brush on full strength WHITE GLUE (PVA) onto an area, strategically place a handful of larger PEBBLES, then cover the rest of the area with sand.
NOTE: my sand is not really sand, it's a material I bought at my local Home Depot called "SOIL EROSION", which is a mixed bag of ballast for use filling sandbags to prevent mudslides here in Southern California. I prefer it to builders sand or playground sand, since it is a rougher mix with a lot of different sizes of grains included, which I think lends itself to my Afghan setting better than a zillion grains of perfectly uniform sand, which to me would look more like the Sahara Desert.
14. And now, the LAST AND FINAL STEP of building this terrain piece: one more layer of glue to help all the sand and pebbles stick to the surface of the hill.
I use Woodland Scenics "Scenic Cement" -- which as is often pointed out by terrain builder online is nothing other than watered-down white glue, but I don't mind paying a little more to avoid having to mix my own white glue and water.
I apply it using an eyedropper...
14. BREATHE A SIGH OF RELIEF, because we are DONE!!!
Well, except for the painting, but I will save that for the next post, except to say that it's MUCH EASIER AND MUCH FASTER than this part, so for me it's always something to look forward to...
Here's a teaser of what it ends up looking like:
(Of course, anyone who's been reading this blog already saw more pics of the finished product in my previous post, but as the saying goes, too much of a good thing never hurt!)