The small but powerful mixed brigade contained the following troops:
INFANTRY
1 x 20 figure Wing* 5th Gurkha Rifles
1 x 20 figure Wing 72nd Highlanders
1 x 20 figure Wing 28th Bengal Native Inf. (Punjabis)
60 Inf.
*NOTE: In the British army of the period, infantry regiments had two "Wings"; IMHO standard TSATF 20-figure platoons are a bit small to refer to as "Battalions," so I use them as half-battalions, AKA: Wings, giving an approximate figure-to-man RATIO of 1:15. Of course TSATF -- like some other popular rule sets -- does not specify any such ratio, but I've never let that stop me from deducing one for myself, to help prepare historical scenarios.
CAVALRY
1 x 12 figure Squadron** 5th Punjab Cavalry
12 Cav.
**NOTE: Since with 1:15 ratio a 12-figure Basic Unit of Cavalry represents 180 men, which is rather too big to use the classic TSATF designation of "Troop," I make it a "SQUADRON" instead.
ATTILLERY
1 x RML 7pdr Mountain Gun w/4 crew, Dejarat Mt. Battery
1 x Gatling Gun w/4 crew, Royal Artillery
8 Art.
HIGHER COMMAND:
1 x Brigade Sgt. Major on foot
1 x Brigadier on horseback
2 Cmd.
TOTAL: 82 figures
The mission of the "Logar Valley Field Force" was simple: cross the bridge over the Kabul River, proceed through the valley, reach the Kharabad Village, ascertain the whereabouts of the Signal Team and exact appropriate punishment for the recent misbehavior of the local citizenry.
The Intelligence Department advised the Brigadier to expect approximately 240 to 300 Tribesmen (half armed with rifles, half with sword-&-shield), with perhaps a unit or two of Ghazi fanatics and/or Afghan Army regulars thrown in for good measure.
*****
On several nights from July 8th to July 18th, my 20 year-old son, Skylar, and I played this larger TSATF game over the same terrain my older daughter and I had recently played on.
The game lasted 10 turns, with advantage swaying back-and-forth a bit before reaching a rather decisive conclusion.
I took a lot of pictures, and will try to let them do most of the talking from here on...
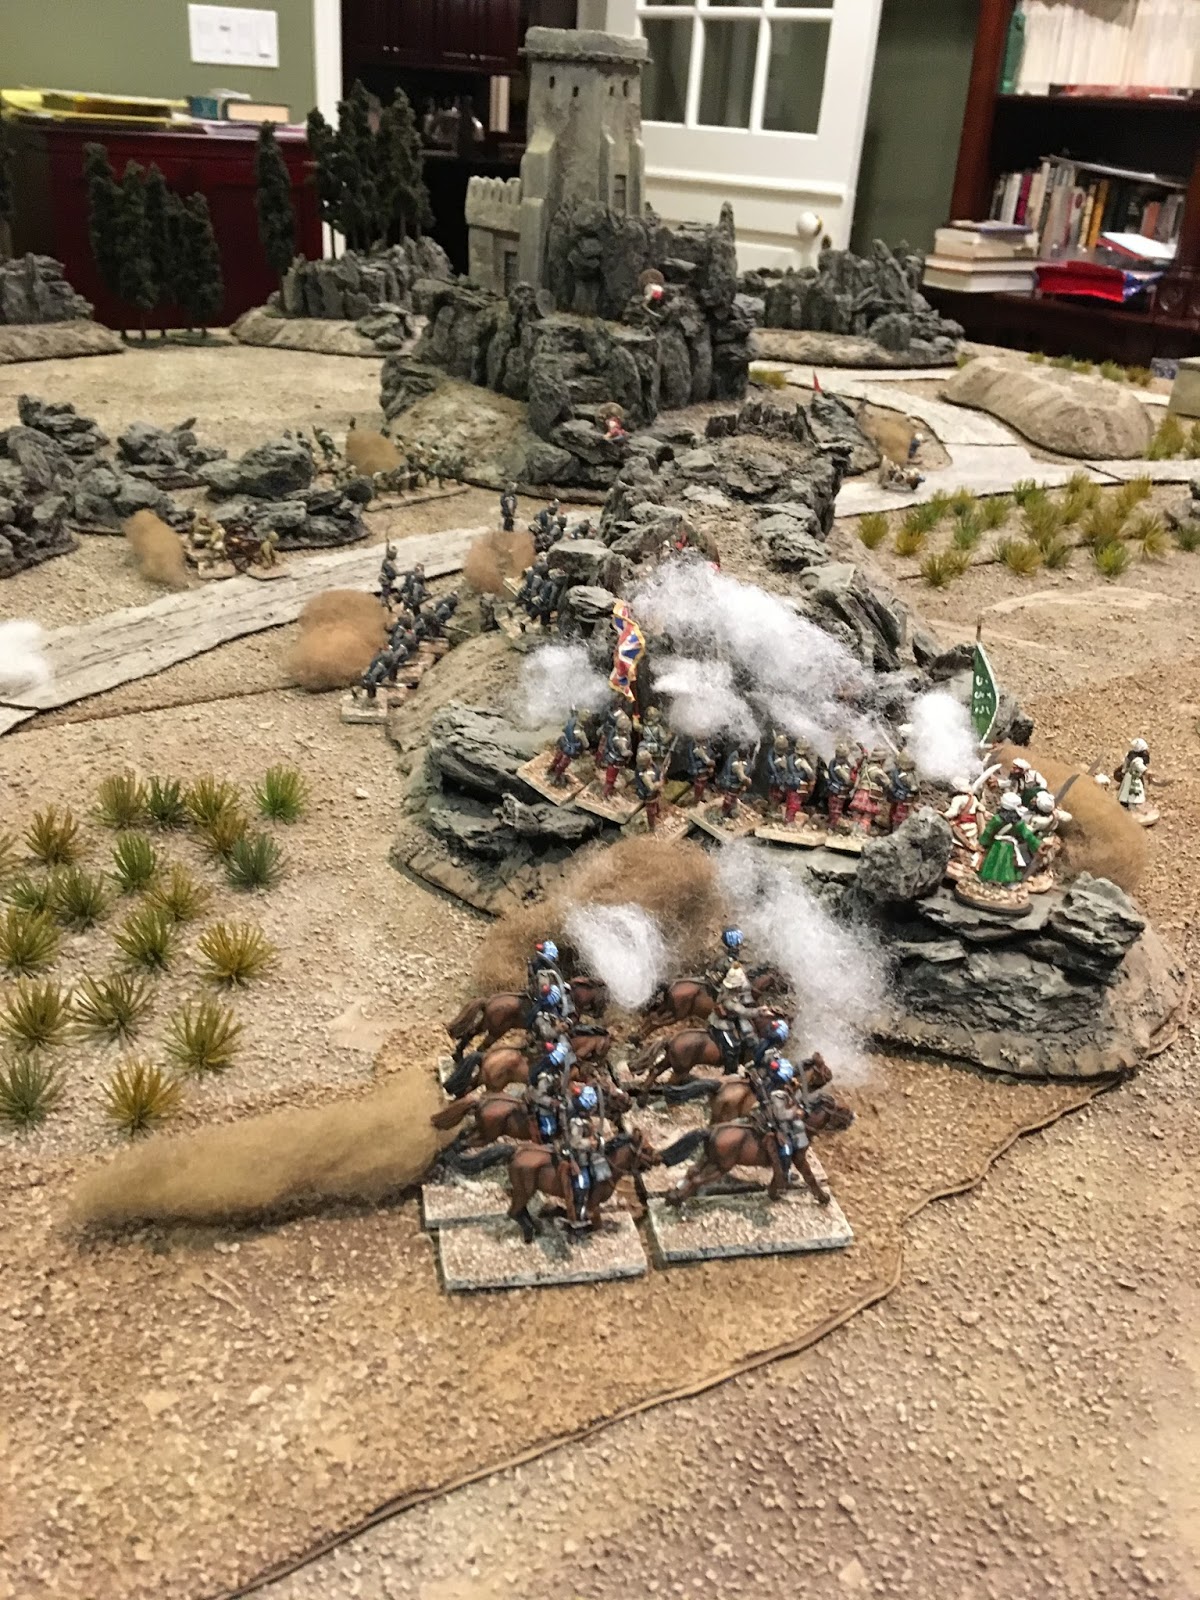
The British deployed their Mountain Gun right off the bat, on the near side of the bridge, and proceeded across the Kabul River in a slow and steady manner, dispatching SCOUTS and focusing on checking HILL CONTOURS and ROUGH TERRAIN AREAS before themselves advancing very far. They also on FIRED INTO those same areas in hopes of inflicting casualties on any ENEMY UNITS hiding therein...
(As is no doubt very obvious, we use cotton or synthetic stuffed-animal stuffing to mark units having FIRED.)


At the end of the FIRST TURN'S FIRE PHASE, a hidden Tribal Unit POPPED UP IN THE ROCKS and opening fire on the 72nd Highlanders in CLASS I "March Column" formation atop the bridge...


The Highlanders split into 2 sub-units with one Leader each on either side of the Bridge and deployed into Class II OPEN ORDER...


We use brown colored cotton as DUST CLOUDS to make units that have MOVED...

The Punjab Cavalry rode on and deployed into OPEN ORDER on the British far Left Flank...


With all 6 British units moved (6 RED playing cards having been flipped), an AFGHAN TRIBAL UNIT POPPED OUT OF HIDING behind the Eastern edge of the rocky hill closest to the British start-line, DECLARED A CHARGE AT THE HIGHLANDERS TO THE EAST OF THE BRIDGE and rolled their 4 CHARGE movement dice, hoping to get at least the 18" they would need to get within 1" of their targets, so they'd have a chance to CLOSE INTO COMBAT when the turn reached its HAND-TO-HAND COMBAT PHASE...

Cries of "ALLAHU-AKBAR!!!" filled the air as the Tribesmen rolled enough distance for their charge to hit home and then some...


To top it off, only a solitary "STRAGGLER" was rolled to be left behind, and with the 72nd deployed in OPEN ORDER, things were looking very good for the Afghans...


Meanwhile the Tribesmen in the rocks continued to FIRE AWAY at the Highlanders on the West side of the bridge...

While the Punjab Cavalry using their carbines from the saddle and both sections of the 72nd poured fire into the Tribesmen in the CLASS III Rocky rough terrain, as did the Gatling Gun at the foot of the bridge...


WITH THEIR "WIN TIES" BONUS FOR CHARGING, THE TRIBESMEN OVERPOWERED THE 72ND DEFENDING IN OPEN ORDER (no beneficial melee modifier) INFLICTING A HANDFUL OF CASUALTIES AND SENDING THE REST OF THE HALF-UNIT ROUTING INTO THE KABUL RIVER!


Gurkhas and Punjabis still bottled-up atop the bridge, watching in frustration as their Highlander comrades get themselves wet in the river below, running from defeat in melee...

The other half of the Wing stands steady to the West of the bridge, backing up to allow their fellow infantry units to exit the bridge and deploy...


The British got a BONUS MOVE (Red Joker) and gave it to the Punjabi Cavalry, who galloped across the road, boxed in the Tribesmen and deployed in OPEN ORDER to fire at them...
The Tribesmen responded by CHARGING THE CAVALRY...
When the Cavalry got their own movement card, they CHANGED FORMATION into CLOSE ORDER in preparation for the melee to come...

The Mountain Gun prolonged into position on the rocky Southern bank of the river to fire at the charging Tribesmen (over the heads of the fleeing Highlanders in the river below) as they charged towards the Cavalry...

The Tribesmen passed their "CLOSE INTO COMBAT" roll and the Punjabis passed their "STAND AND FIGHT" roll (no surprise there as British troops with a Leader can't fail that one!)...

With their multiple beneficial melee modifiers of +2 for "Regular Cavalry" and +1 for "Defending in Close Formation" vs. the Tribesmen's paltry "Win Ties" for "Charging", the Cavalry won big, sending the few surviving Tribesmen fleeing South down the road... not far behind the fleeing remnants of the Clan that had occupied the Rocks, who suffered enough casualties from the comcentrated fire of the enemy to force a CRITICAL & PINNED MORALE CHECK, which they failed...


The Wing of the 5th Gurkhas finally move off the bridge and deploy to the West of the road, in front of the intact half of the Highlanders...


Regimentla Bhisti giving aid to WIA hit by Tribal fire from the ROCKY TERRAIN...


Punjab Infantry still bottled-up on the bridge, behind the Gatling Gun's limber...


END OF TURN 3
Out on the British left flank, 5th Gurkhas* enter at patch of rough terrain SCRUB BRUSH and deploy into SQUARE, wary of being charged or fired at by more Tribesmen hiding in the rocks just South of them...
*NOTE: Gurkhas are the only British troop type to suffer NO MOVEMENT PENALTY for movement in ROUGH TERRAIN.

The Mountain Gun crosses the bridge, deploys and OPENS FIRE on those same rocks, just in case more Tribesmen really are hiding there...


The Gatling Gun prolongs off the foot of the bridge and prepares to fire, making way for the Punjabis to FINALLY get off the bridge themselves...


The Punjabis advance in "Class II" OPEN ORDER...


Oh my goodness -- a SECOND CLAN hidden in those same ROCKS...


By now the broken half of the 72nd has RALLIED, crossed under the bridge and climbed out of the river on the same side as their dry comrades, with whom they recombine...

Meanwhile the Punjab Cavalry trot in OPEN ORDER to the foot of the North hill and check visibility on the lower contour...

only to discover a clan of GHAZI FANATICS (in unfinished but very convenient Litko "Horde" movement trays) hiding behind edge of the hill...

The Ghazis proceed to do exactly what is to be expected of them: CHARGE!!!!
They also do well on their "STRAGGLER" roll, leaving only 2 of their 20 figures behind


Somehow the combat cameraman didn't get a pic, but the Pathan rifle fire "ACE" casualty card below WOUNDED the Commanding Officer of the 72nd Highlanders...


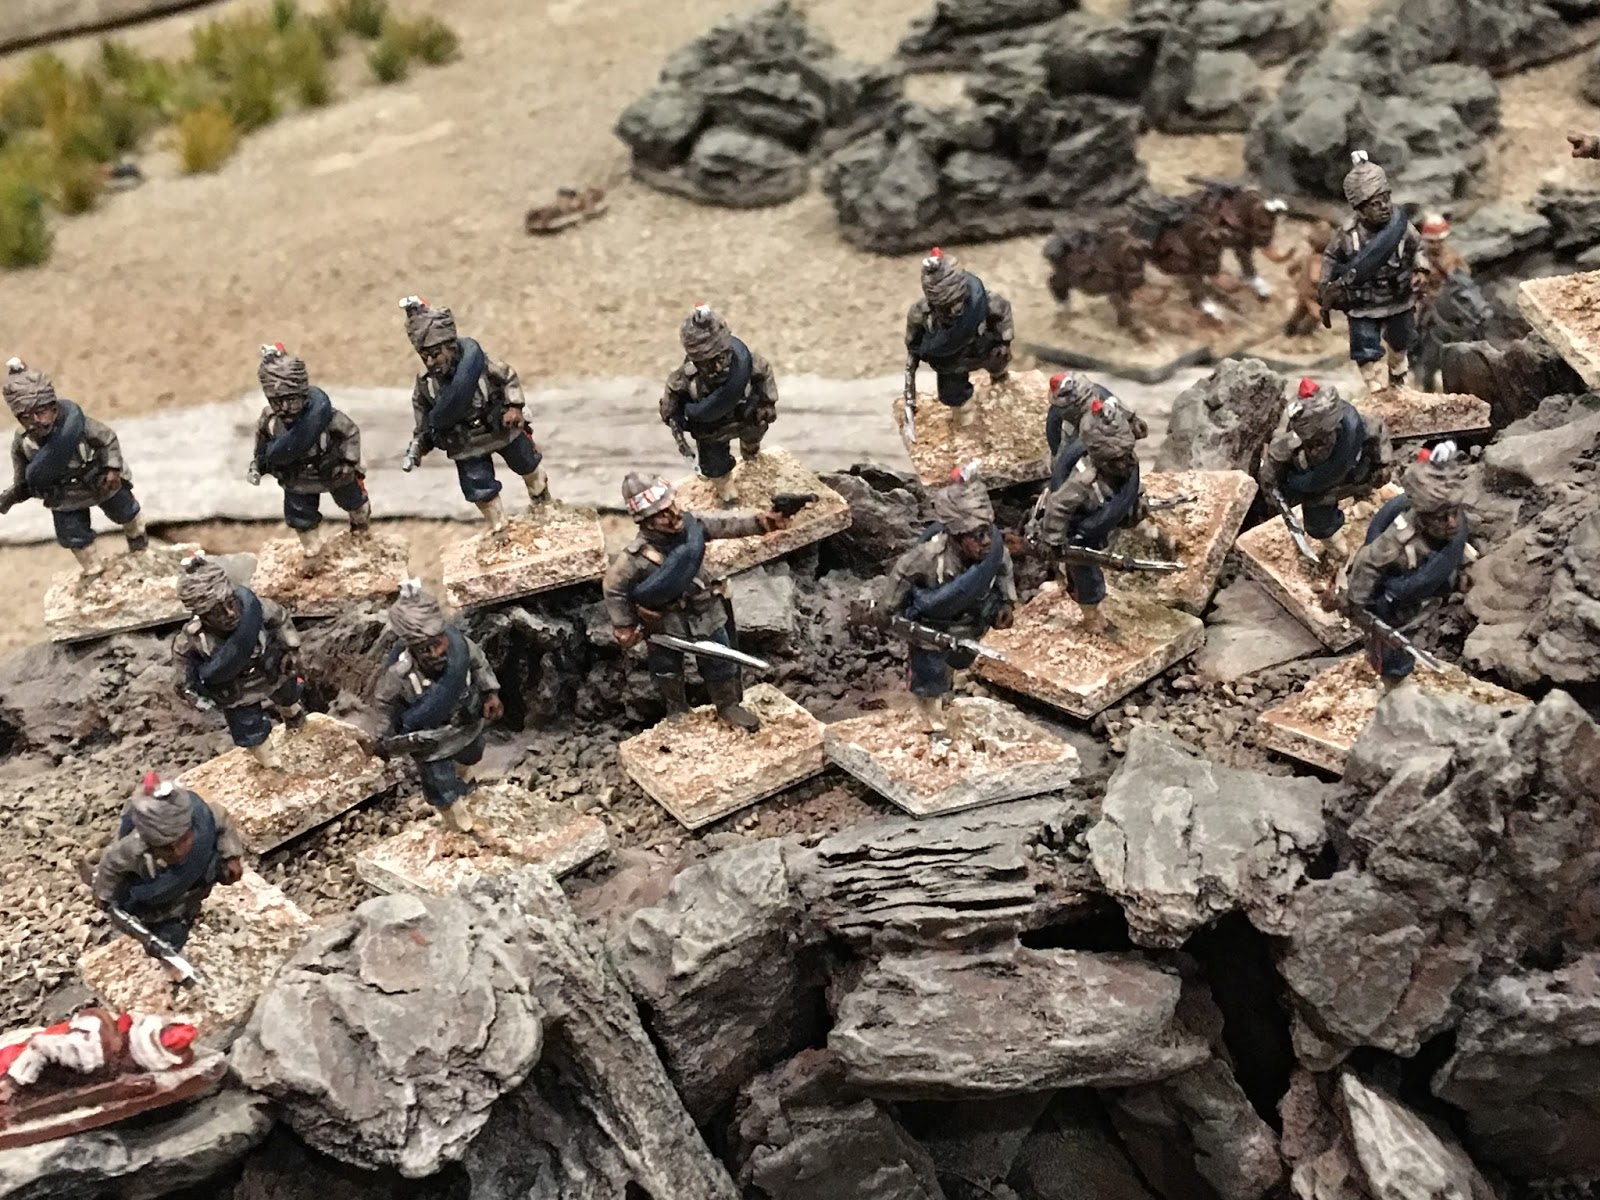
The Gurkhas suck it up, emerge out of their ultra-secure "Square-within-rough-terrain" and advance in OPEN ORDER towards Tower Hill...

FIRE PHASE: yet another clan of Tribesmen pops out of hiding atop the North rocky hill to OPEN FIRE on the Punjabi Cavalry...


The British line-of-battle shakes into shape with Gurkhas, Punjabis and Highlanders strung together across the center of the table from West to East, with the Mountain and Gatling guns prolonging on the road between Highlanders and Punjabis, and the Punjab Cavalry off-screen to the right, at the edge of the North rocky hill...

Gurkhas reach the rocky terrain that held the sniping Tribesmen...


As they did earlier, the Cavalry take advantage of their ability to REFORM by CHANGING FORMATION into CLOSE ORDER, thereby gaining an additional +2 for the coming melee against the CHARGING Ghazis...


Yet another hidden TRIBAL CLAN -- this one atop the front slope of Tower Hill -- emerges from hiding to OPEN FIRE on the Punjabis...


Unit by unit the British FIRE BACK, those with an angle on the Tower Hill enemies fire at them, those without the angle fire at various remaining ROUGH TERRAIN areas of HILL CONTOURS where still more as yet unseen enemies may be lurking...

The Ghazi-Punjab Cavalry Melee ENSUES... and despite their "+1" AND "Win Ties" AND every WOUNDED RESULT BEING ROLLED FOR TO DETERMINE IF IT EFFECTS THE WOUNDED FANATIC OR HE SIMPLY SHRUGS IT OFF... the Cavalry emerged victorious...


The 9 surviving ROUTED Ghazis -- including their sole Leader -- manage to RALLY...

Sadly, their less-devoted cousins atop Tower Hill, after taking enough casualties from combined British rifle, artillery and Gatling Gun fire to force a Morale Check, don't do as well, FAIL, and start ROUTING off the Hill and down the road...


The Gurkhas have again gone into SQUARE, worried about being charged by yet more Tribesmen or -- heaven forbid -- more Ghazis ensconced somewhere on Tower Hill...

Major Calvert Smith, commanding the Wing of 5th Gurkhas, clearly visible below, shoulder-to-shoulder with his beloved Nepali riflemen...

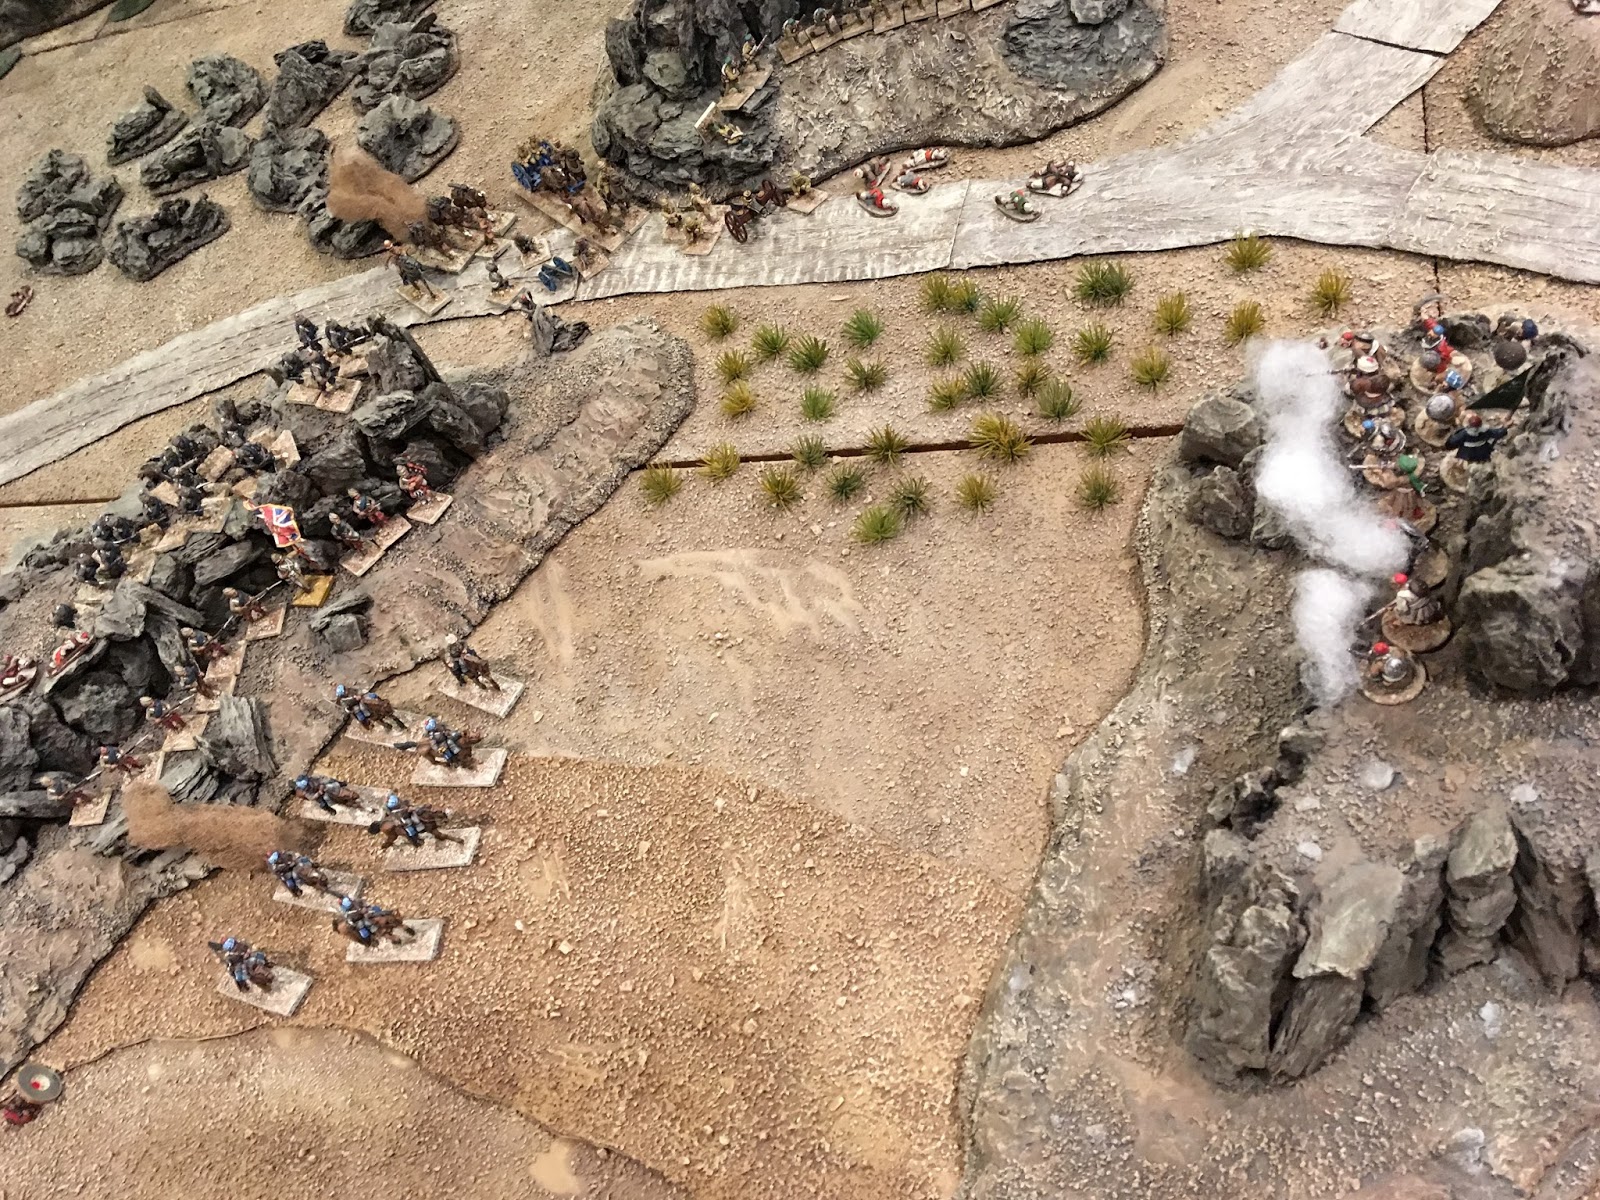
72nd Highlanders start to CROWN THE HEIGHTS of the North Hill on its narrow Eastern side...

Remnants of the Tribal clan shot largely to pieces atop the hill are visible below hiding themselves on the reverse-slope, just above the remnants of the Ghazis...

Punjab Cavalry form a reserve, ready to react to more hidden unit charges, and keep the Ghazis -- now safe from fire on the reverse slope -- from causing too much trouble...


Punjabis start to CROWN THE HEIGHTS of North Hill on its South-West side...

The RED FLAG clan RALLIES and finds a spot safe from enemy fire on the South side of Tower Hill...


The rallied Ghazis CHARGE THE 72nd HIGHLANDERS atop North Hill...


Prior to the melee, Tribesmen atop the hill and Highlanders climbing right below them EXCHANGE RIFLE FIRE at pointblank range as the Ghazis prepare to attempt to CLOSE INTO COMBAT...

A handful of Punjab Sowars with appropriate angles-of-fire open up with their carbines...

Punjabis make their way upwards...


MELEE TIME: the 72nd Highlanders -- who disgraced themselves when half of them routed away from the prior melee -- engage with a vengeance, looking to at least somewhat redeem themselves...

The last "Green Ghazi" standing -- their Leader, Mullah Zarghun* -- does his best, hoping to cut down all dozen or so men in plaid trousers...


...but sadly fails to do so. He survives, losing on a "Fall Back" melee die-roll result, and then, even more sadly, rolling ROUT DICE that take him and his 3 surviving brothers-in-Holy-Warrior-ism straight OFF THE TABLE...


END OF TURN 8

The Punjabis reach the top contour and truly CROWN THE HEIGHTS...


The handful of Tribesmen effectives still atop North Hill find themselves trapped between the 72nd Highlanders to their front and Punjabis behind...

The Gurkhas advance to occupy the base contour of Tower Hill...


The Gurkha SCOUT dispatched to reconnoiter the pine-wooded hills on the Western edge of the table races to rejoin his unit...


The Punjab Cavalry reposition along the road in the center of the table, in preparation for the coming advance on Khairabad Village...


The Gatling Gun prolongs up the road, setting up so its 60-degree Angle-of-Fire covers the North Hill and the Village Road...


Remnants of the Tribal clan atop North Hill continue to exchange fire with the 72nd Highlanders...


...but now find themselves also being fire at from behind by the Punjabis...


A fresh Tribal clan pops up atop the low sandy hill in front of the village to FIRE at the Gurkhas...


The Mountain Gun opens fire on the Tribesmen atop the low sandy hill...

The Gurkhas fire back and -- those without the angle -- at the South Hill, where they suspect yet more hidden enemies may lurk...


The Gatling Gun does the same...


The Tribesmen get TWO HITS on the Gurkhas, casualty cards are flipped...

OUCH. TWO DEAD, INCLUDING THE HIGHEST-RANKING LEADER -- First Wing of 5th Gurkhas Commanding Officer, Major Calvert Smith...

More cracks of rifle fire and more clouds of smoke, together with 10 more Tribal riflemen on South Hill...


The last 2 survivors of the Tribal clan that occupied North Hill, found themselves virtually surrounded and FAILED their Morale check, ROUT towards the nearest table-edge...

The Mountain Gun prolongs further up the road, deploying close to its artillery sister, the Gatling...


Casualties from combined British fire start to tell on the Tribesmen atop the Low Sandy Hill...


The Bhisti of the 72nd Highlanders gives a drink to a poor damned soul on North Hill...

Looking South from the North end of the table, with the Tower and Village visible in the distance and some local residents in the foreground...


The Brigadier coordinating the next phase of his advance...


END OF TURN 9


Exchange of fire between troops ensconced on opposing high ground continues...


The entire Wing of Punjabis finally reach the top of North Hill and add more rifles to the British tally...

The Highlanders reposition along the South slope of North Hill, where they too can bring FIRE to bear on South Hill...


The combined British fire casualties force a "CRITICAL & PINNED" MORALE CHECK on the Tribsemen atop the Low Sandy Hill, requiring a 7 or below on two D6...

Whoops.

Remnants of another Tribal clan ROUT past the Village of Khairabad, heading for the South table edge...

END OF TURN 10


One hit, one casualty card FLIP...
Ouch.
One KIA Highlander...


At the end of TURN 11, with just one untouched 20-figure TRIBAL UNIT still hidden in Khairabad Village together with the surviving 5 Riflemen and 1 Swordsman/Leader originally hidden on Tower Hill, facing off against the very substantial remnants of the British Field Force -- only one unit of which had taken truly substantial casualties (72nd Highlanders with only 9 effectives remaining, including the attached Sgt. Major) the village ELDERS made the decision to hoist a WHITE FLAG OF SURRENDER over Khairabad...

...and then sent out 3 bedraggled but relatively healthy Signalmen, in exchange for what I hoped would be a merciful decision regarding further destruction of the village itself...


The skirl o' the pipe(s) filled the air as the bloodied but whole Signalmen rejoined their brothers-in-arms...


As the method of punishment to be meted out was not specified in his orders, the Brigadier decided discretion would be the better part of valor, welcomed the wounded Signalmen back, had them examined by his medical staff and then loaded onto the Gatling Gun limber for transport. He was quite happily surprised to have found anything but their dead bodies or parts thereof, and felt pretty good as he gave the command for his entire Force to turn around and march back down the road towards the bridge over the Kabul River and the British camp beyond...
His command of 82 figures had been reduced to 57 effectives, suffering a total of 25 CASUALTIES, 9 KIA and 16 WIA.
KIA were: 1 Punjabi sepoy; 1 Punjab Cav. Sowar; 1 Gurkha Rifleman & Capt. Calvert Smith, Commander of the Wing of 5th Gurkhas; and 5 Privates 72nd Highlanders.
On the other hand, he had inflicted a total of 114 combined KILLED, WOUNDED, & ROUTED casualties on the enemy force of 142 figures, leaving only 26 Afghan effectives.
*** *** ***
Despite ending up on the rather decisively losing side... I really enjoyed this game.
Despite his early setback I felt my son did an excellent job commanding the British... while I came up very short indeed.
Though I came up somewhat consistently short on the fire, melee, and morale dice rolling fronts... my biggest failure was not CONCENTRATING FORCE -- be it fire or melee attacks -- on individual British units. Instead I took a piecemeal approach, hoping to deliver "death by a thousand cuts," when what I should have done was launch two, three, or even four fires or charges to a one British or Indian unit at a time, in hope of delivering "knock-out blows" one unit at a time.
Ah, well! I did manage to inflict just over 30% casualties on the enemy, including a couple of officer casualties. To quote Rudyard Kipling's "Arithmetic on the Frontier"...
A scrimmage in a Border Station --A canter down some dark defile --Two thousand pounds of educationDrops to a ten-rupee jezail --The Crammer's boast, the Squadron's pride,Shot like a rabbit in a ride!
I left the decision on how to respond to the White Flag entirely up to my son as British commander.
He is a results-oriented, methodical and cautious player by nature, so he decided the high casualties already inflicted was punishment enough and chose to declare victory and head home without risking any further casualties of his own -- a decision everyone in Khairabad Village, combatants and non-combatants alike, heartily approved!
On the way back to the bridge, a reinforced Signal Party was assigned to occupy the Citadel on Tower Hill...
It consists of 3 Sergeants, reinforced by a certain regimental Bhisti...


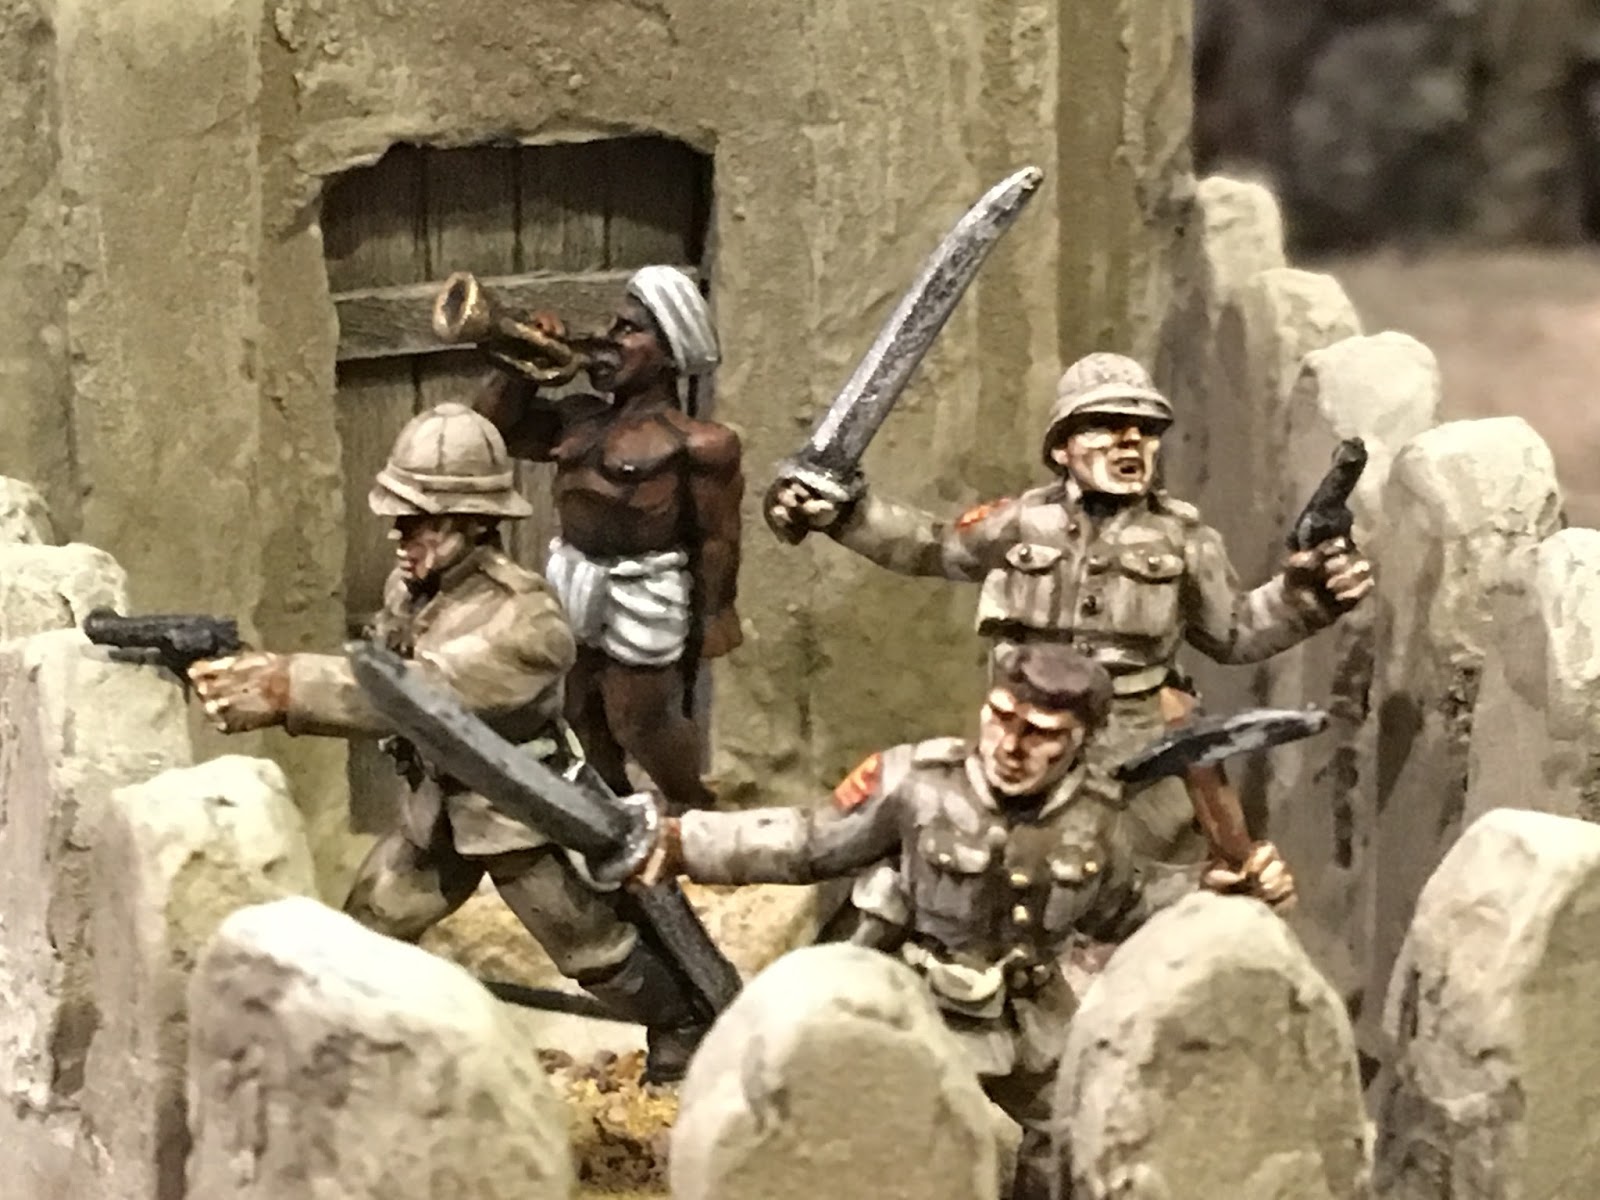
Since then the Sergeants Three have been joined by a fresh detachment (20-figure Basic Unit) of Punjabis, adding insult to injury in the eyes of the locals. The question is... will the Tribesmen of the Logar Valley take their rather decisive defeat to heart... or yet again rise up against the Infidels in their midst...?
Only time -- and the availability of one or more of my three children -- will tell. In full disclosure I am hoping to get at least two of them to team up against me next time, one to command the Tower garrison when it comes under BLESSED ATTACK, and the other one or two to command the relief column dispatched from across the bridge.
Hopefully we can pull it off before the Summer ends. After all... the family that plays Victorian colonial wargames together, stays together.
Отличная игра мой друг! Прекрасные фото и комментарии. Очень завидую, поскольку сами все не можем собраться- поиграть.
ReplyDeleteFrom the Russian, via Google Translate:
DeleteGreat game my friend! Lovely photos and comments. I envy you very much, because we can not all play together.
Thank you, Andrei -- I envy you as well, and -- what I think might be a better translation -- like you, wish we could all play a game together.
Simply inspirational stuff, what a triumph!
ReplyDeleteMany thanks, Michael! Always great to hear from you!
DeleteA cracking game! The cavalry played a blinder with their support, and even the Jocks redeemed themselves. The British commander made a wise decision, I think. Looking forward to the next encounter.
ReplyDeleteThanks for taking the time to comment, AJ, and I agree, cracking indeed!
DeleteRe: the next encounter, I too am looking forward to it!
Great stuff Ethan looking forward to the next instalment.
ReplyDeleteBest
Willie
Thanks, Willie!
DeleteHoping to see a new blog post of your own some time soon!
Ethan, beautiful table and figs, inspirational!!!
ReplyDeleteGreat AAR as well. It definitely sounds like you and Skyler had an awesome time my friend.
Cheers,
JB
PS: I Love the Gunga Din set, who painted it???
Jeff!!!!!!
DeleteThanks very much, my friend, always great to see your comments here!
You're right, Skylar & I had a very good time, something I know you understand from gaming with your own kids.
Of course the Sgts. Three & Gunga Din were painted by my #1 mini Artiste, Igor Olshansky, aka: IGWARG.
Outstanding Mad Guru,
ReplyDeleteGreat AAR. I love the story line. The figures of the wounded being released was classic. Well done. As usual your table looks outstanding. Actually seeing your tables in person I can appreciate all the time you put into these works of art.
Last Stand Dan
Dannnnn!!!!
DeleteSincere thanks for your very generous compliments, my friend!
Glad you enjoyed the "plot" of the game, though it was of course a real game, and if I'd really been in charge of the plotting, I would have found a way to make it into at least a narrow Afghan victory!
Thanks for the high praise for my table! In fact my terrain boards are in need of some TLC maintenance and upkeep, which I hope to get around to before the end of this year, but It's nice to know they still look good as-is.
Thanks for mentioning the pics of the 3 wounded being released from captivity, as I thought they made for some nice pics as well!
Hopefully next time you're in SoCal you can stop by to see it all for yourself in person!
Outstanding - a new Mad Guru battle report. Fantastic stuff. Thank you very much for this. I really should get some Bhisti wallahs.
ReplyDeleteKeep 'em coming!
You are very welcome indeed, Conrad!
DeleteI must say I agree: you really SHOULD get some Bhisti wallahs!
After all, what sort of man would send his troops into the heat of battle -- 'specially roundabout Injia's sunny clime -- without benefit of those whose sole job was to keep their parched throats supplied with liquid refreshment?!
Brilliant! Wargaming at its finest. More to come I hope.
ReplyDeleteThanks for the very high praise, William!
DeleteI too hope there will be more to come -- at least one more game on the same terrain before Summer ends and my 3 kids all go back to school!
Shabash Huzoor!
ReplyDeleteLovely figures and terrain.
Always good to hear from you, James -- especially in the local dialect!
DeleteThanks very much, Stu!
ReplyDeleteDespite many decades in the hobby, I hadn't heard of that book before, though I'd certainly heard of Ted Herbert! I will have to look for a copy and check it out.
Re: a Tribal attack on the British camp... that's a very interesting idea, and one which may yet come to pass in one form or another!