I've called this project "The Accidental Hill-Fort" because until literally just before I started building it, I had no intention to, so it virtually came into being by accident!
This past October I put up a post about some figure conversions I'd done that came back with fantastic paint jobs from my favorite painter -- who sadly does almost no painting anymore. Included in their ranks was a pair of British drummer-boys, who I'd converted to represent JAKIN and LEW in a game based on the battle that serves as the finale for the Rudyard Kipling short-story: "THE DRUMS OF THE FORE AND AFT." (to visit that post CLICK THIS LINK)
To prepare for laying out the table-top battlefield, I re-read the story, and rediscovered the presence therein of, "a wasp's nest of a small mud fort," which serves to delay the pair of screw-guns that are the only artillery the British have, and which go on to play a vital role in the latter stages of the battle to come.
I own a pair of very nice Afghan/North-West Frontier type forts, but both are far too big to serve this purpose in one corner of the table. I also have a very old school Airfix Foreign Legion Fort, complete with tower -- which is now removable, so it can be used on its own, without the previously attached walls. I also have a large collection of Medieval castle parts, including a bunch of towers... and last but far from least, I have a square "Chitral Tower" purposefully built for Afghan/Frontier games. So one would imagine I could have found an absolutely perfect piece of model terrain to fill the role of that, "wasp's nest of a small mud fort," and yet... after auditioning each and every candidate for the role, none of them really worked. I planned to use the rocky hills I'd built for the battle of Charasiab to build the valley from the battle, complete with its trio of gorges, through which the Highlanders, Gurkhas, and "Fore and Aft" entered the battlefield, but the footprint of the "Chitral" tower was a little too big to fit atop any of them. One of my Medieval towers also almost fit, but its base was just a bit too big, plus it would have needed an "arid" paintjob to look the part and appear like more of an Afghan tribal stronghold than a European baron's or fantasy "wizard's" tower.
This left me with the Airfix FFL tower.
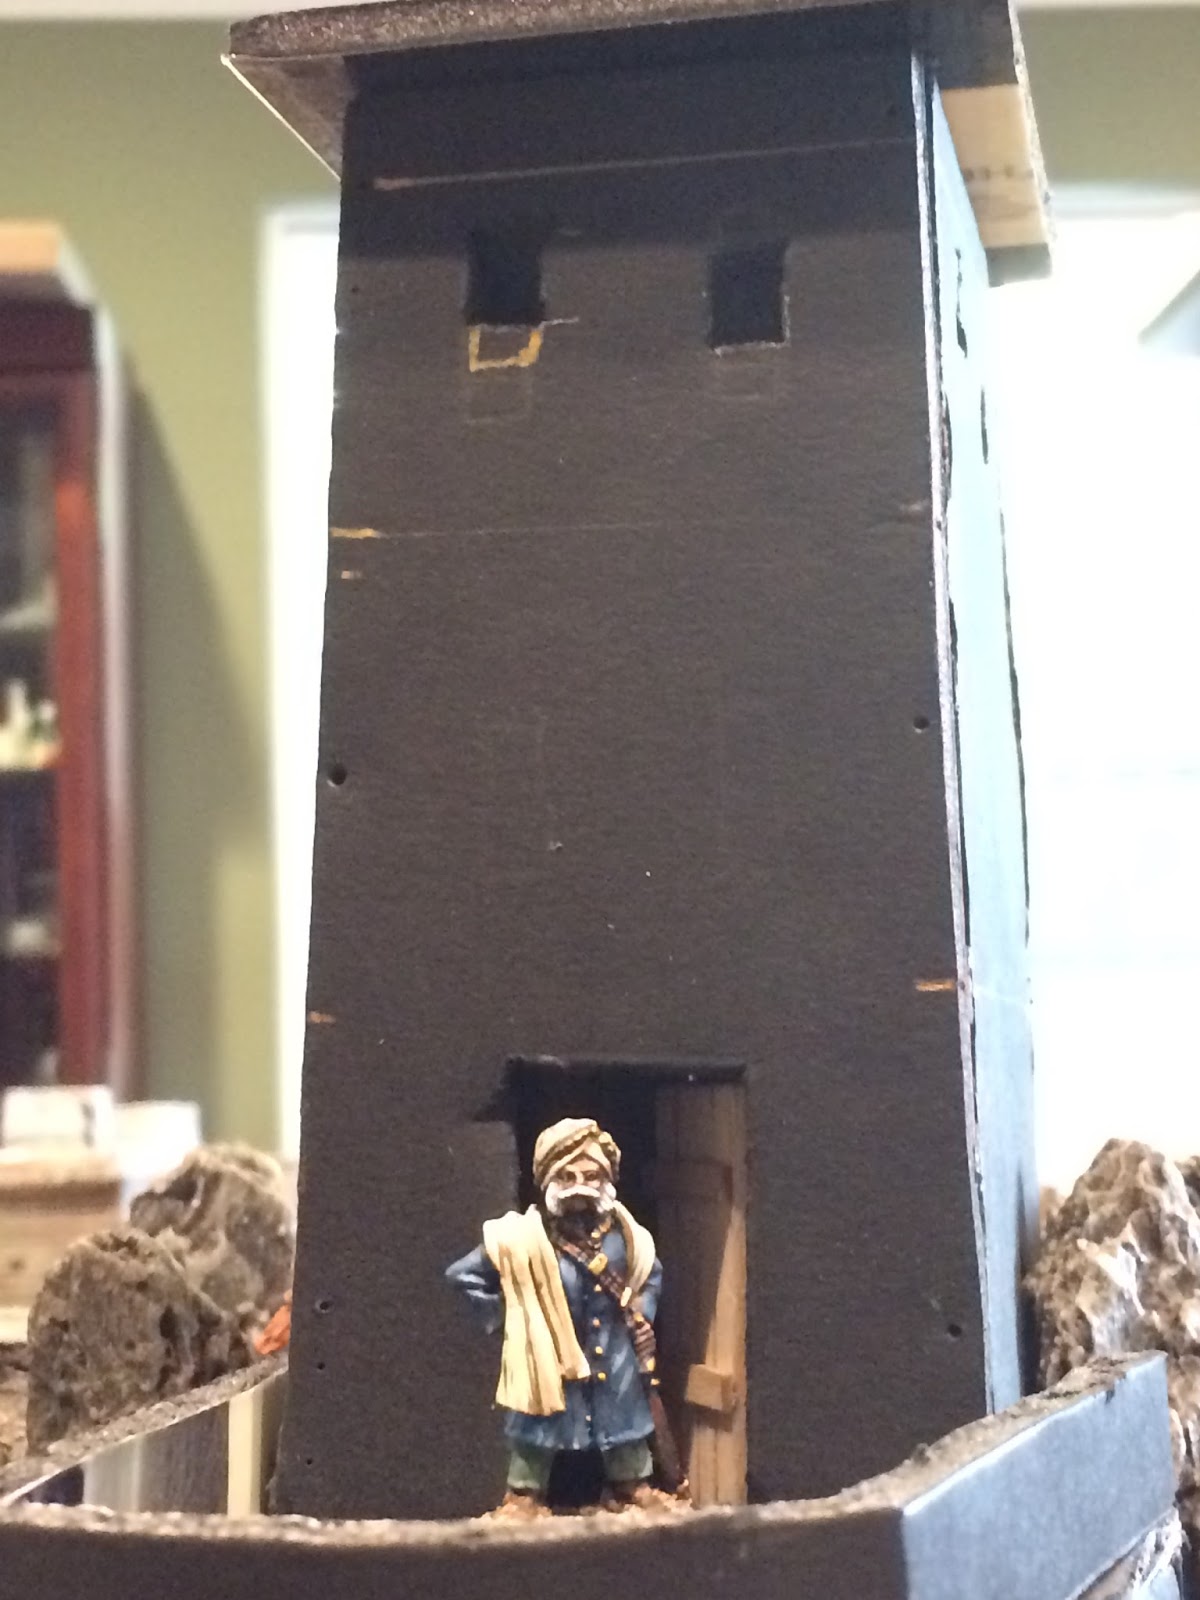
It could have worked... but it would've needed a new paintjob (covering over the yellow sand paint job I gave it some 35 or more years ago!), and I would have had to come up with a solution for the lack of access to the interior -- perhaps just not having access and keeping track on paper of how many defenders were shooting out of how many windows -- and, most important of all... I would have had to accept representing the "mud fort" as a plain and simple tower.
Needless to say, I did not do that.
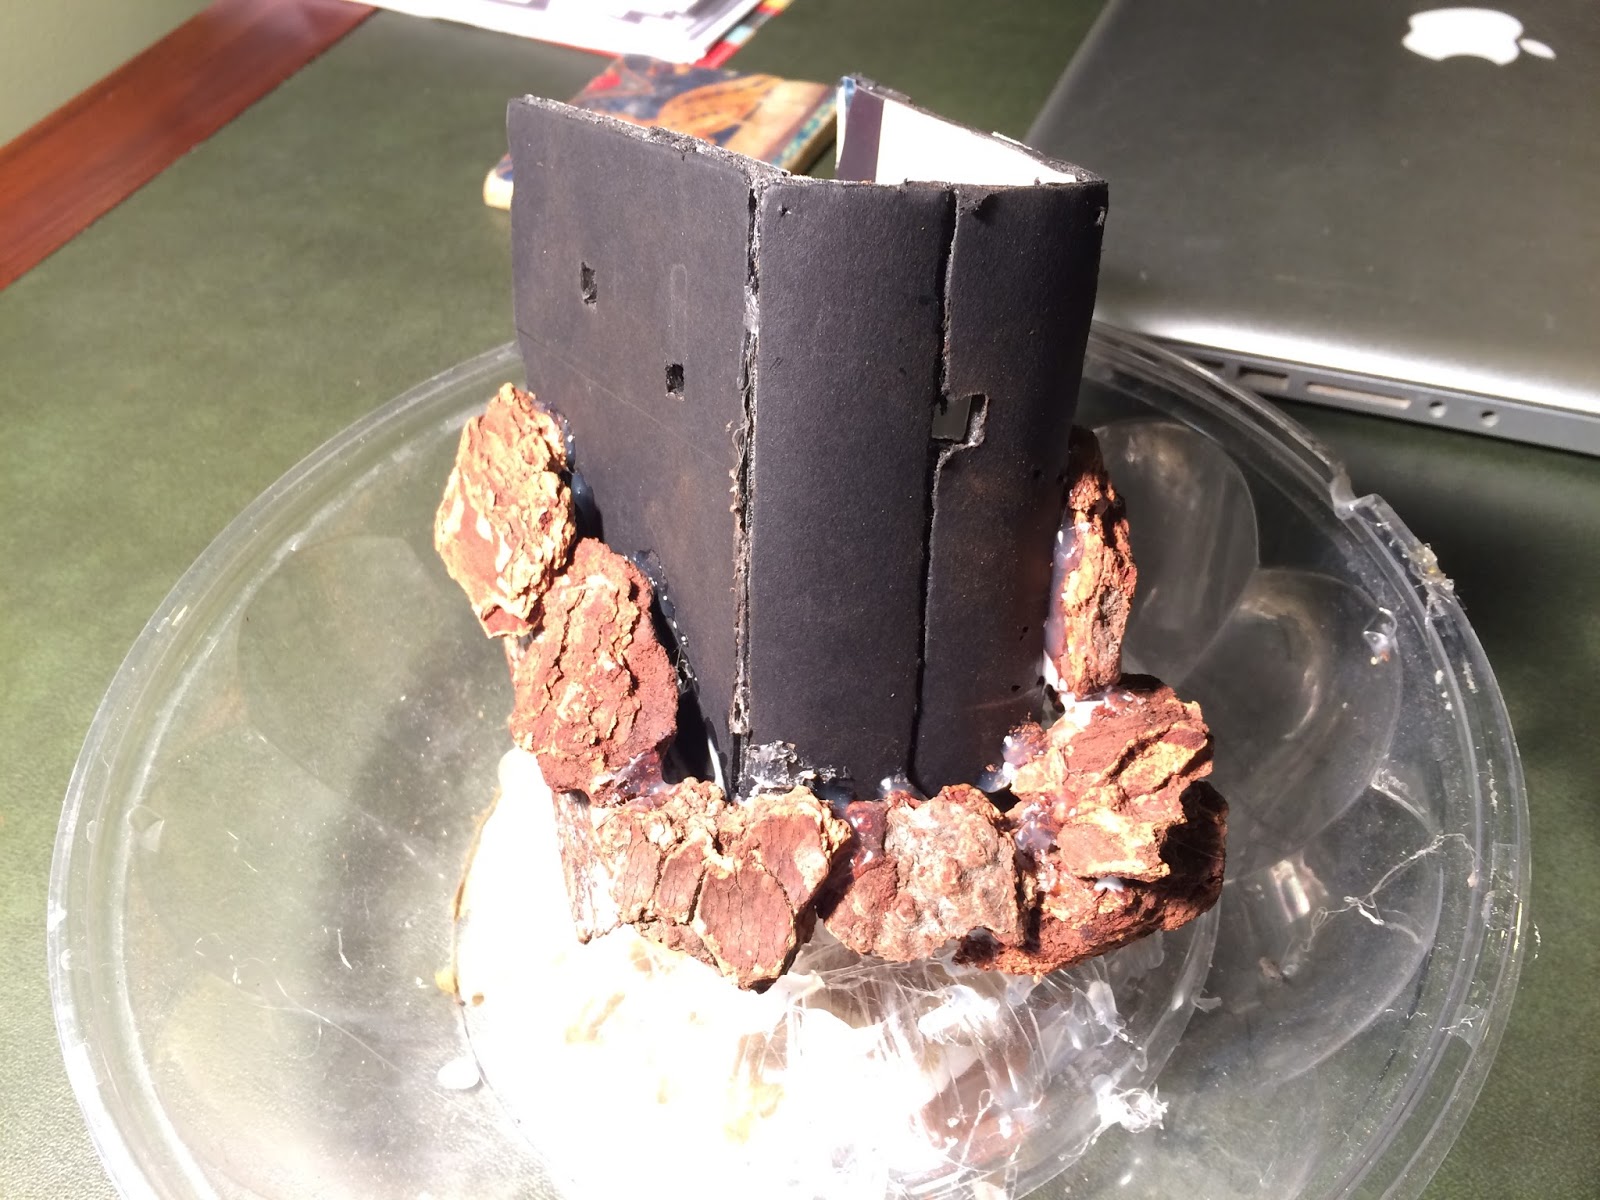
Instead, I decided to build a mud hill-fort from scratch that would fit snuggly onto one of my rocky hills, but remain COMPLETELY REMOVABLE, so the hill below could still function as a plain hill whenever I wanted it to.
Let's pause in my overwrought and overwritten "Plain Tale From the Hills" to take in some visual reference gathered around the web on Afghan/NWF forts and towers...


I've built a lot of miniature terrain, and done a pretty good job, but it's almost always NATURAL features: ground cover, hills, rocky areas, rivers, swamp, woods, etc. Not man-made buildings.
I've done a decent job on the odd man-made item, like the Kabul gateway I built to fit in with my previously purchased desert fortress wall set, and the c.1840 British Cantonments I built for the same Kabul layout, but both of those were pretty simple. Much more simple than any of the forts and towers shown above.
Still, as a devoted 19th Century Afghan Wars and NWF gamer, it seemed only right that I should have a hill fort that actually fit atop one of my hills. So I decided to give it a shot.
I started out by choosing what I thought would be the best hill from the seven I built.
Then I got some LEGO from where I'd recently packed it away with various other stuff my teenage children never use, and used it to try and work out the best approach to incorporating the theoretical fort into the existing hillside. For better or worse I didn't take any photos of this "LEGO" prototype phase of construction, but when I thought I'd figured out a general idea of how to proceed, I moved onto the CARDBOARD PHASE, and from there on, I took WAY TOO MANY pictures, as you will soon see.
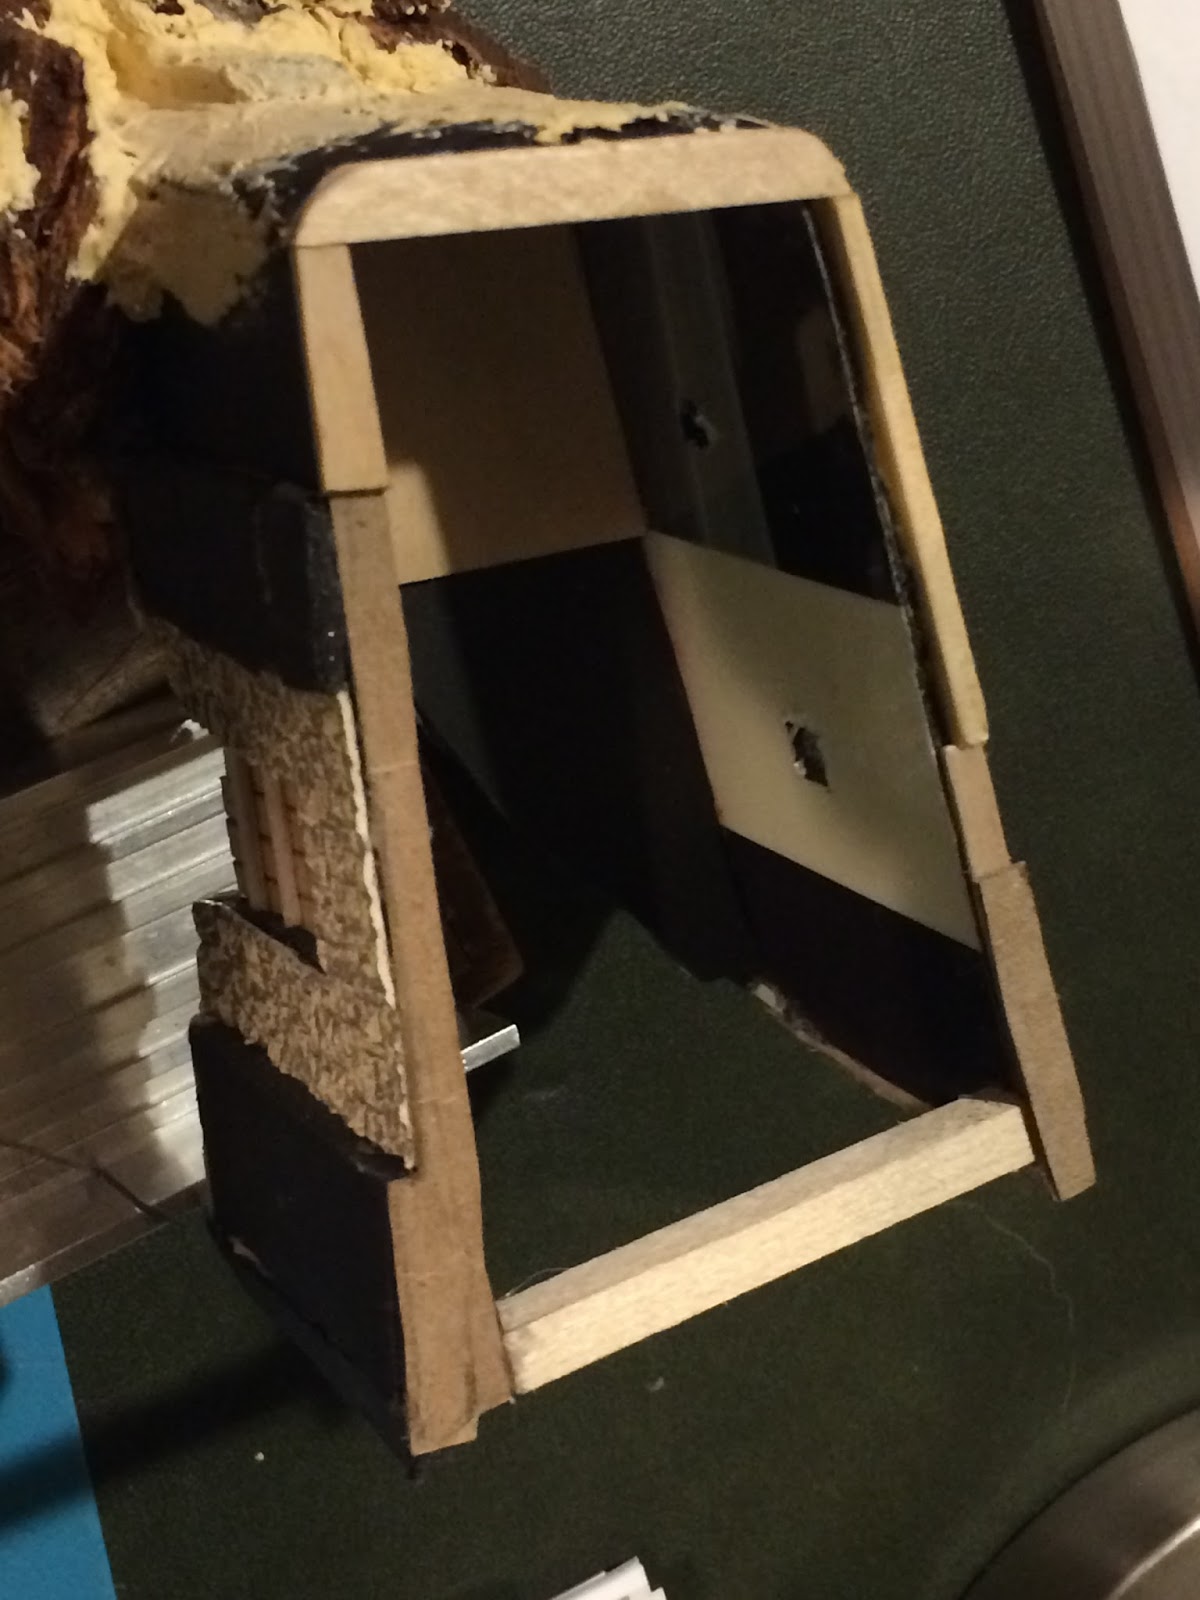
You'll also see from the pics that the design changed a bit during the building process, with regard to how the lower building and upper tower go together, and a few other details. I think the various changes were for the better. When I was mostly done I added some additional BUTTRESSES. I think more architectural details is a good thing, until you cross a line and the model becomes too busy. The joins provide more layers and shadow and raised edges to highlight with paint, all of which should add to the final look of the model.
My biggest resource through the building process was the pair of great colonial gaming buddies I made at the first ever Colonial Barracks convention in New Orleans, back in November 2011, Jeff "Sgt. Guiness" Baumal (click to visit his excellent blog HERE), and "Last Stand Dan" Gurule (click to visit his blog HERE). Both of them fielded endless questions from me and gave me tons of great advice all along the way. However good, bad or indifferent the Tower looks, without their help it would have looked a lot worse, so thanks again guys!
At a certain point I debated over whether or not to add CRENELLATIONS to the wall around the large lower roof deck. On the plus side I felt it would look very good, but on the minus side I worried it would look too elaborate and over-decorated for a tribal "mud fort," whose purpose would have been almost entirely utilitarian, and which would've been built in a very challenging environment. I did some more research and searched around for more visual reference and was lucky enough to discover the perfect inspiration: a photo of a fortress wall in Khiva, Uzbekistan -- complete with crenellations which were not at all ornamental. I've included that reference pic below, in the spot where it helped me with the build.
When you reach the end you will see the model has yet to be painted. Once that's been done I'll post the second part of this "Towering" chronicle. Until then I hope you enjoy the pics below without overdosing!
With that being said, I will let the pictures tell the story from here on, except for some notes on materials...
TUTORIAL NOTES:
1. The Tower walls & floors are made of FOAMCORE, reinforced with bass wood.
(This too was ACCIDENTAL -- when I started building on a whim, I happened to have a box of black foamcore in a corner of my garage. I had never built anything with it before, and if I did it again I WOULD NOT USE BLACK, simply because it's so difficult to visibly mark it with a pencil or pen!)
***DO NOT ALLOW ANY SUPER GLUE to touch the foam sandwiched between the paper shell, as super glue will INSTANTLY DEVOUR the foam!***
2. The doors are balsa wood, scribed with a sharp pencil; the crenellations on the lower roof-deck and the wall around the tower rooftop are blue builder's styrofoam; the "putty" is Elmer's Wood Filler.
3. At different points in the process I used HOT GLUE, SUPER GLUE, WHITE GLUE, and "Aleene's Fast Grab TACKY GLUE" -- a fast-drying white glue.
4. I used PINS to hold the walls together before they were glued; I used DOLLHOUSE HINGES for the 3 working doors.
5. I used offcuts of POLYSTYRENE thin plastic hobby sheets to reinforce the crenellations.
6. I used my trusty GARDEN WOOD BARK CHIPS to more seamlessly blend some building edges into the rocky hillside.
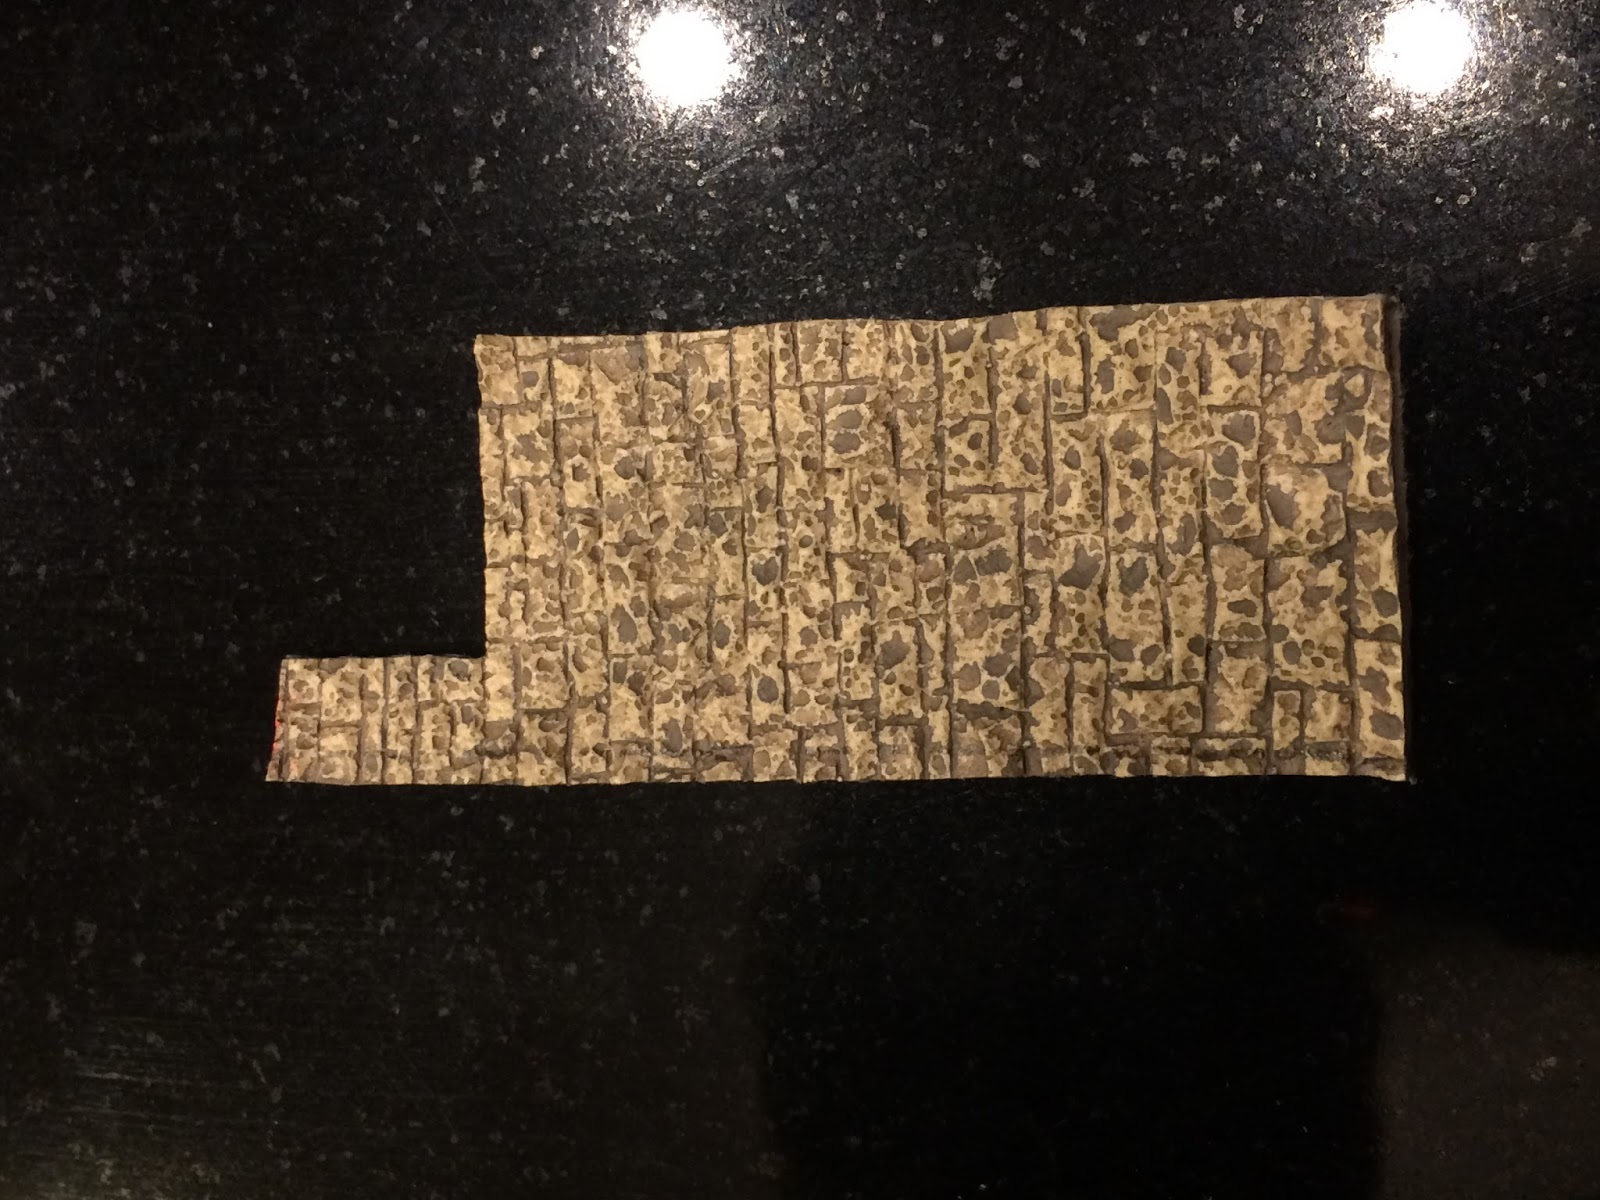
7. Finally I used store-bought CHOOCH ENTERPRISES flexible small random stone wall - with peel-&-stick self-adhesive backing - for the areas of revealed underlying brickwork.


My goodness me, what an epic build and what a fabulous result! It is posts like these like keep me coming back time and again, absolutely wonderful.
ReplyDeleteCracking stuff...
ReplyDeleteTurned out very well Ethan.
ReplyDeleteThat came out beautifully! I hope to see it in person soon and fight my into or out of it lol. Following your build was very cool. Any suggestion from me was minimal compared to your creative modeling skills. Thanks for the great blog, it should inspire gamers to start their next projects.
ReplyDeleteLast Stand Dan
That's a pukka build!
ReplyDeleteNicely done! I like the way it seems to emerge from the landscape much like the prototypes.
ReplyDeleteThanks for all the great comments, guys! I've been trying to reply one by one but somehow "Blogger" just won't let me, as is often the case unfortunately on my blog! Anyhow, I really appreciate you all taking the time to write something!
ReplyDeleteGreat build my friend! What an excellent piece! I can't wait to attack it or defend it in your upcoming scenario. It's very hard to believe it's not actually attached to the hill, very craft brother. We are all looking forward to the finished piece. That's a very detailed WIP, but I'd expect nothing less from the perfectionist that you are. Thanks for the mention of my assistance, but it was minimal and supportive at best.
ReplyDeleteMay you possibly be taking the Fore & Aft battle on the road to a con???? I hope so!
Thanks for all the photos, what a great build and I too would have instinctively gone for non crenellated but I think what you have done is splendid!
ReplyDeleteBest Iain
Sgt. Guiness, thanks for taking the time to comment, and one way or another YOU WILL get to play this scenario... here, there, or somewhere else!
ReplyDeleteIain: thanks very much for your comment as well! Yes, it took me a whle to convince myself to go down the "crenellated" route -- with helpful encouragement from my buddies, Sgt. Guiness and and "Last Stand" Dan -- but I agree with you, it turned out well in the end!
This comment has been removed by the author.
ReplyDeleteMG, I will most definitely take you up on your offer my friend!
ReplyDeleteCheers,
JB
I can only wish you many more such happy accidents in the future! That's truly a delight to the eyes.
ReplyDeleteDear Sir / Madam,
ReplyDeleteAre you facing financial, debt or any other hurdles in operations of your business and all other financial activities...!!
We have solutions for every hurdle. Our Company is a single window solution for all types of outsourcing work in field of Finance, providing funds etc.
Contact us Now via Email: royalworldfundings@gmail.com
Our goal is to provide the highest level of convenience to our customers because every business has limited resources and to as well empower the general public financially.
A trial will be convincing.