About 2-1/2 years ago a close friend of mine who I used to wargame with a lot before he moved to a foreign city, sent me a big box. It was filled with a classic Ian Weekley designed multi-part VAUBAN FORTRESS that I had agreed to paint for him as soon as I got the chance. One thing did not lead to another and about two years later my friend diplomatically suggested I send the box back, as it seemed like I would never get around to painting it as promised.
This sent a shudder of guilt and shame through my body and soul, and I told him I wouldn't send it back until I was finished with it. I'm a busy man, but after two years that was no longer a legitimate excuse. At this point I had to start working on it!
The one productive thing I had done over those intervening two years was check in with the one master modeler of wargame terrain I know, Chris The Model Maker, and ask him for some pointers on painting red-brick forts. Specifically, I asked if he used any particular approach to weathering red-brick buildings, as opposed to the drab, earth colored buildings I had previously learned his "secret formula" for weathering. He was kind enough to send me some info on his approach to painting and weathering such buildings, which helped me a great deal, and put me in a position where -- once I finally got started -- I felt confident the project would probably turn out alright.
I dug around the internet, searching for visual reference on Vauban Forts and exchanged a few emails with my friend who I would be painting it for, and settled on the red-brick with contrasting grey stonework paint scheme, which I discuss a bit more below alongside the pics of the first red brick wall section I finished painting.
The whole thing -- 13 pieces in all (my friend ordered a couple of reinforcement pieces about halfway through!) took me about two months from start to finish, and I just finished a few days ago. I'm very happy with how the fortress turned out, and I'm happy to report, so is my expat friend. I've gotten his permission to keep the fortress on hand long enough to have another good wargaming friend of mine -- Michael "Reggie" Davis of HORSE & MUSKET BLOG -- who has an incredible Seven years War collection, visit my place, so we can take some good photos of his gorgeous miniatures in and around the fortress.
We also hope to play one big 18th Century siege game with the fort, either War of Spanish Succession, Seven Years War, or American War of Independence, depending on who is available and exactly what 18th Century Lace War armies they can contribute (I myself have only a mid-size collection of F&IW troops and even fewer AWI).
As usual, I took WAY TOO MANY PHOTOS of my painting process for this Vauban fort. Instead of putting them all out at once, I've broken them into BATCHES, to make things more manageable, and reduce the chance of visitor's eyes glazing over from an overdose of red brick and grey stone. Some batches are small, with only half-a-dozen pics, while others are XXL, with up to 60. The average is probably 25.
I'm going to start out posting the first few batches today, followed by several more posts, each featuring a number of batches of pics. It shouldn't take too long, and I think it will be better than one giant dump of photos, which could overwhelm you, my valued visitor! I plan to put up a new post every day or two, until I reach the end.
Anyway, enough with the wordy intro, here's the first few batches of photos..
1. DELIVERY


2. SPRAYPAINTING BASE COATS
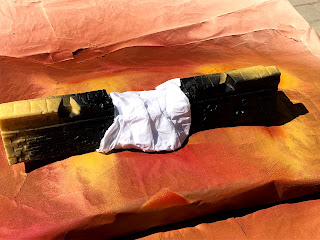
Step one in this process is priming/base-coating the pieces with spray-paint.
IMHO using spray-paint for the base-coat has a number of advantages: easy & fast use; adds a hint of texture to the model; dries fast.
I used a variety of colors, with the intent of providing subtle variation to the finished paint-job with its uniform coloring, by having darker and lighter undercoats.
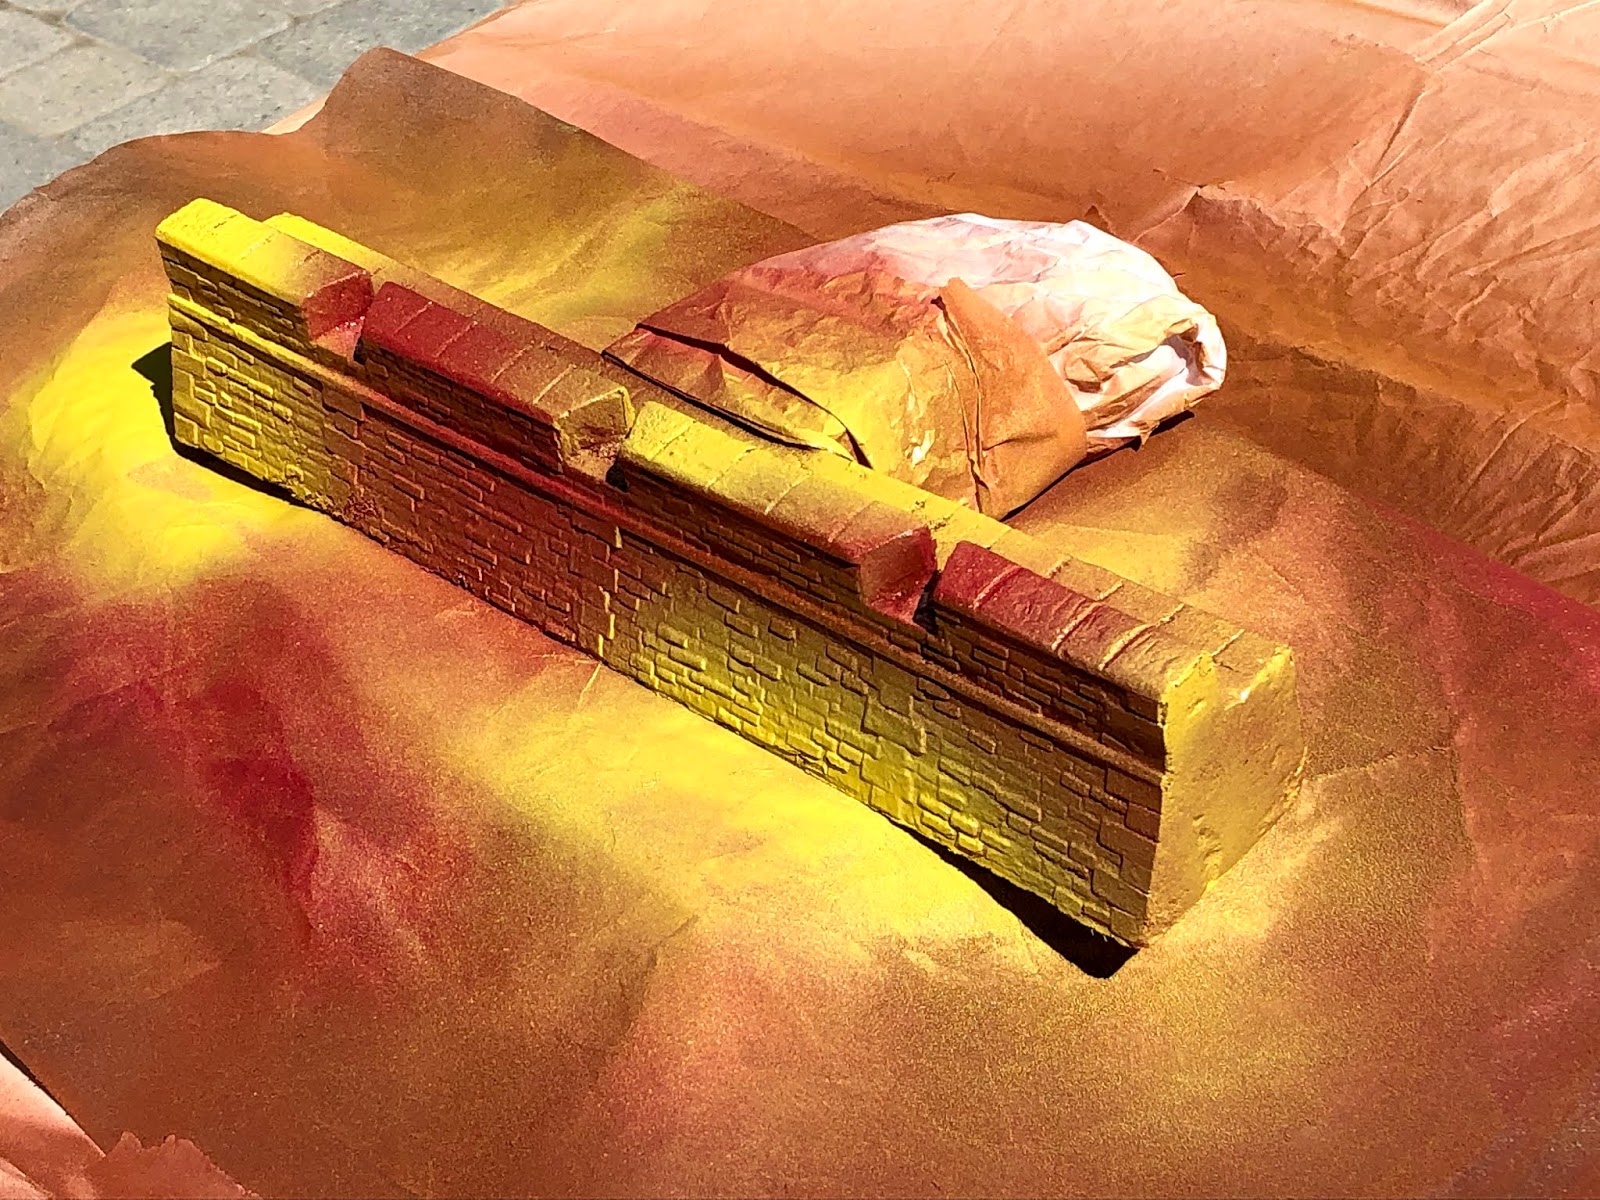
For the red brick paint scheme, my base coat colors, pictured in one of the shots below, were:
1. Red
2. Brown
3. Yellow (on the dull side, not bright)
4. Red-brown (what a surprise!)
5. Black (only for use on the damaged portions of the breached wall)
NOTE: I used paper and tape to MASK the areas of EARTHWORKS, to make sure those got no paint excerpt for the BROWN that I wanted them to get.


The less insane Vauban painter's friend: if you want to paint a fortress as red-brick, and would like to get done really fast and don't mind a down-&-dirty approach, I strongly suggest using this Krylon RED OXIDE PRIMER. If someone told me instead of using several different primers and half-a-dozen shades of red for my brick fortress paint job, I could only use one paint, this would be it:

3. CRAFT PAINTS
The aforementioned multiple shades of RED. The most important and heavily used ones were CraftSmart ORANGE SPICE and Delta Ceramcoat RED IRON OXIDE...

2 x shades of gray and 2 x shades of drab/khaki, used for all the stonework, in this order:
1. Rain Gray
2. Mudstone
3. Quaker Gray
4. Sandstone

2 x darker shades of gray, used for standout stonework and the tower rooftops...

5 x shades of brown used in various combinations throughout on wood (Delta "Walnut Brown" & Craft "Brown") and earthworks (those 2 plus Folkart "Honeycomb" & "Fawn", and Apple Barrel "Country Tan")...

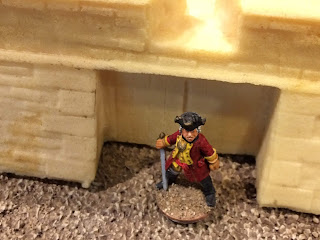
4. FIRST WALL SECTION PAINTED
I started out with the Orange Spice, a color I think matches well with the overall look of red brick forts and other buildings. Not too bright, not too pale, with more of an orange hue than a strong red. Of course this is largely a personal taste thing, and if you think bright fire engine red, or something in between, will look better on your brick fort, no worries. I considered the easier path of painting the entire fort pale gray and drab stone, which would be just as historically legit of a color scheme, but decided this red brick with contrasting grey/drab stonework would have more visual impact. I think that turned out to be true, but I also think an all grey & drab version would look pretty awesome, and require much, MUCH less work! After a first sloppy coat of Orange Spice, I hit different areas of the brickwork with the other shades of red. I hoped that in the end they'd all be tied together by both the contrasting grey stone and the overall weathering wash, which we'll get to a bit further down the line.


That's almost 50 pics (44 to be exact), which is enough for what I have now decided to call "CHAPTER I" of my Vauban painting saga. As mentioned above, I shall return with "Chapter II" in the near future, which will include the "secret formula" weathering wash, posted here 4 or 5 years ago, in connection with painting my Afghan Hill-Tower (CLICK HERE if you missed or want to revisit THE PAINTED TOWER).
NOTE: If you're interested in taking a closer look and/or buying some of these Vauban fortress pieces, they are currently available from Magister Militum in the UK. I believe they are now cast in the white resin which you can see the 2 separate RAMPS in these pics are made from, rather than the hard polyurethane foam which I believe they were made of by Ian Weekley's company, "Battleground," back in the day, and which everything in the above photos -- except for the 2 separate ramps -- are made of.
Don't apologise for all of the photos. this is a fascinating tutorial! Looking forward to the next installment.
ReplyDeleteLovely to see the piece take shape, surely worth waiting for? ;)
ReplyDeleteWell this is turning out rather well.
ReplyDeleteGreat looking brickwork already, looking forward to more!
ReplyDeleteBest Iain