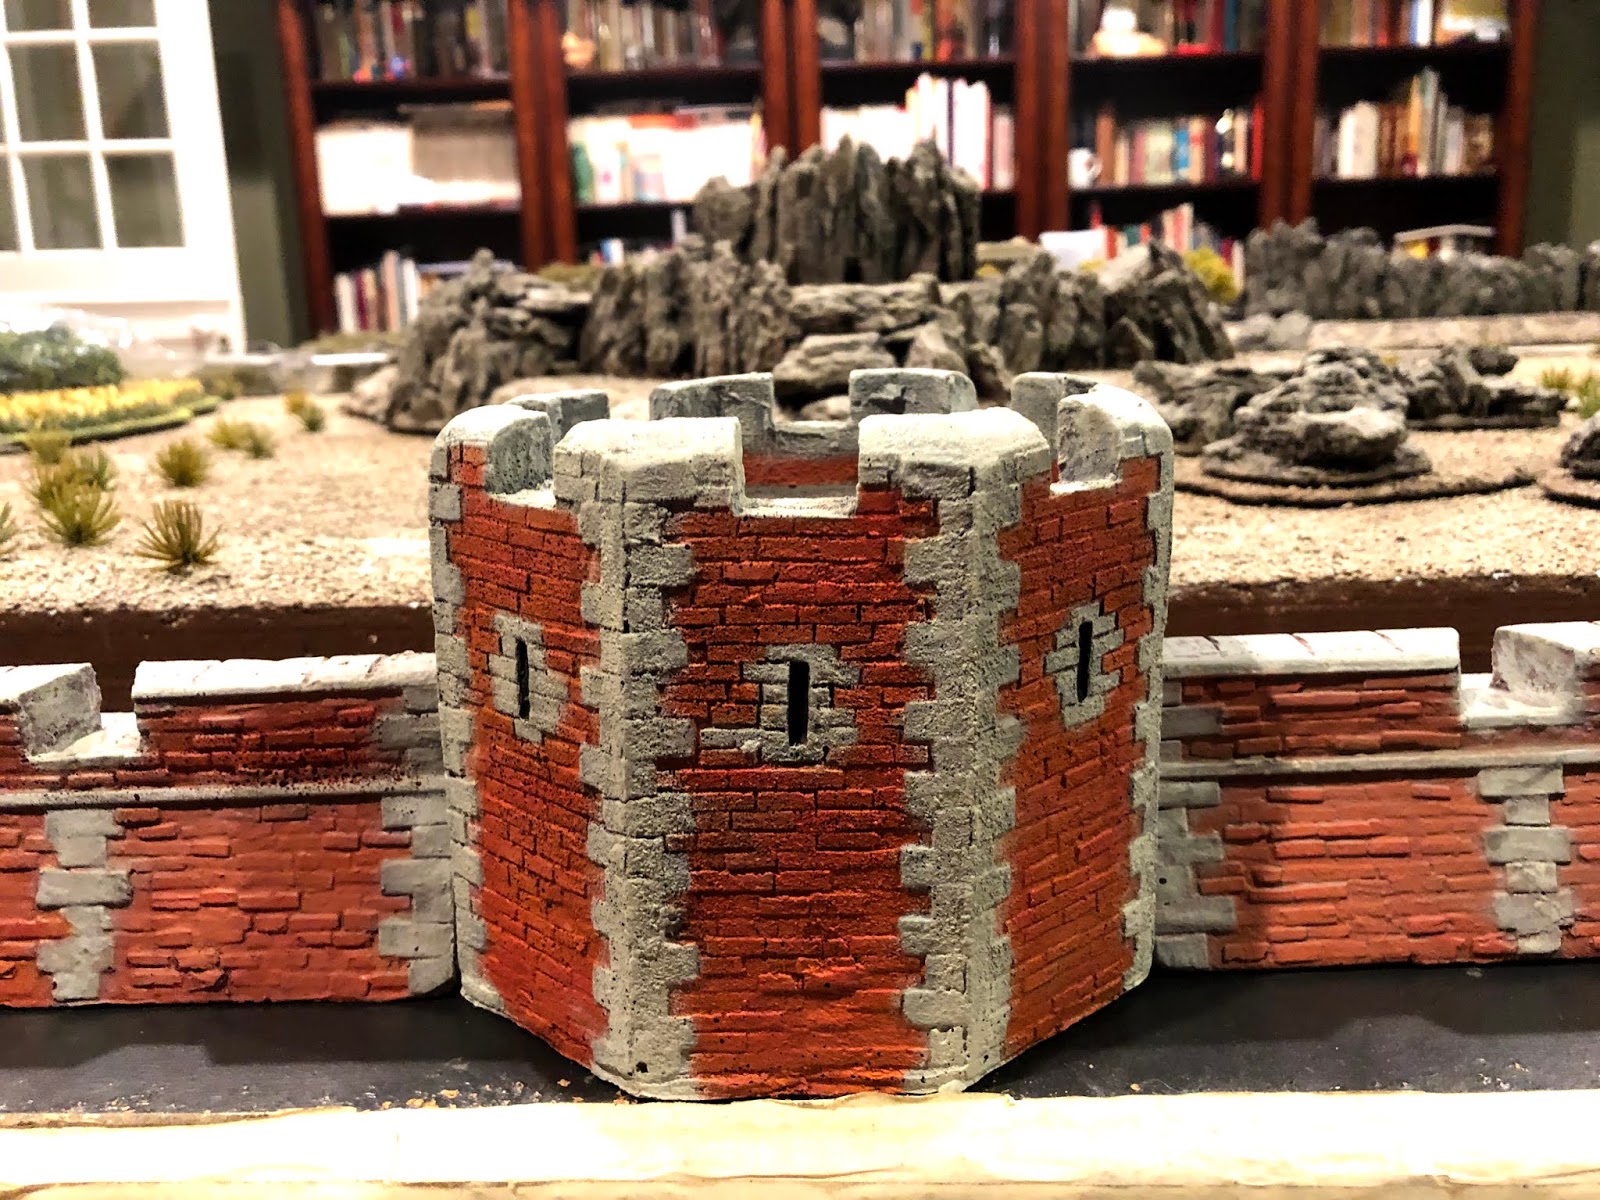
9. Tower
Somewhere along the way the tower had been primed black, I assume by its previous owner. Years ago I painted a Hudson & Allen castle and started it out with a pure black base coat, and it turned out pretty great. But this time I sprayed it over with the mix of red, brown, and yellow.
The first step with the craft paints was to fill in the narrow windows and open roof hatch with Americana LAMP (EBONY) BLACK -- a great color to use when you want something very close to black with just the barest hint of something lighter.


Then for the red brick is was back to the mix of the same 4 or 5 colors from Ch. I, led by ORANGE SPICE, and RED IRON OXIDE, and I hit the DOOR with a first coat of Delta Ceramcoat dark WALNUT BROWN, and let it pool in the recesses between molded planks...

I used the same 4 color scheme on the cornerstones, starting with Delta Ceramcoat RAIN GREY, and gave the rooftop a first coat of Craft Smart DEEP GREY...


As work on the NEAR ENDLESS ROWS OF CONTRASTING STONES continued, I developed a dislike for the tower's octagonal design with its EIGHT LINES OF STONE each now needing me to pick them out in FOUR SUCCESSIVE SHADES OF GREY AND DRAB COLOR!!! But of course the final effect when I got there made it worth all the time effort -- of course! Though I did say a silent prayer of thanks for the fact that there was just one such tower in the fortress!


The two photos below give a nice clear view of the "spotty" effect I was going for with the base of ORANGE SPICE accented by smaller areas of the other shades of RED...


As the rather large amount of work needed to get to the finish line for the entire fortress made itself more and more clear to me, enjoying the view and taking pics of the completed and near-completed pieces arrayed together, along with my flight-of-fancy colorful pair of doors (courtesy of magic markers) would raise my morale and keep me from wavering in pursuit of the objective...


Though I have F&IW armies stashed away in my hobby closet, when I started this project I only had these 3 SYW officers easily accessible. Them plus one box of mixed AWI troops, who make more appearances in future photos...


10. Corners


RAIN GREY stonework...


MUDSTONE stonework...


QUAKER GREY stonework...

And finally the final coat of SANDSTONE stonework...


Another trip down WEATHERING WASH lane:
1 x drop of BLACK
1 x drop of HIPPO GREY (Delta Ceramcoat)
6 x drops of TAN (Craft Smart)

Plus one spoonful of the all-important LEPAGE ALL-PURPOSE WHITE GLUE...
(which dries TRANSLUCENT)


MIX THOROUGHLY TOGETHER...

ADD WATER...

Then apply to model with a cheap 1" or 1/2" brush,
DRYING WITH HAIR DRYER AS YOU GO.
This weathering wash will add a dusty,
chalky, worn EFFECT to the model...


Looks like these two have had enough of each other...

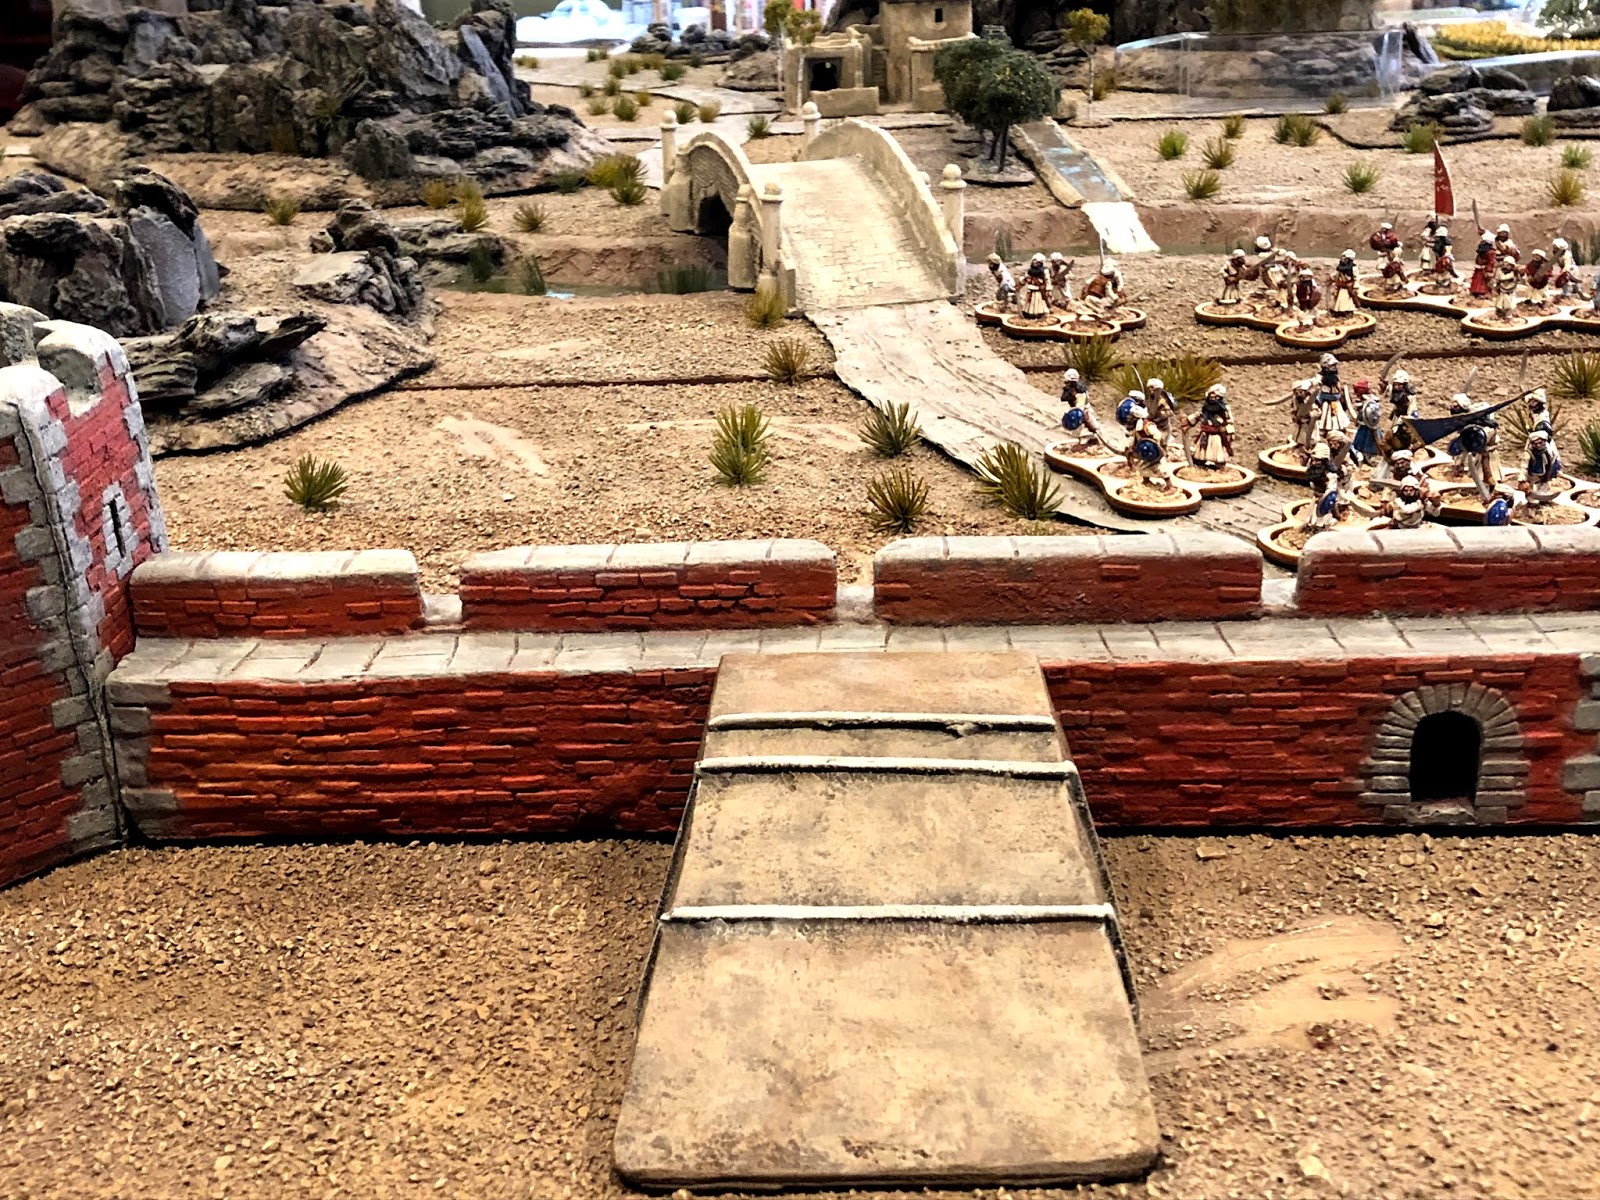
11. Ramps
These two spare ramps look very useful and were made with very different material from the other, older, pieces of the fort. The ramps are white resin, while the other parts are POLYURETHANE hard foam. The foam pieces had some noticeable imperfections in their casting, while these ramps looked like their molds were able to deliver picture perfect casts...

...but on the other hand, that wasn't the end of their story. While the ramps on their own looked perfect, when set up against the walls they're meant to work with, they were just...... a little too tall:


About 1/8" to 3/16".

I filed this info away to mull over and got back to painting, hitting all three ramps -- the one molded to a wall section + the 2 x spares -- with base coats of:
1. Delta WALNUT BROWN


-- then doing a heavy & splotchy dry-brush of:
2. Craft Smart BROWN

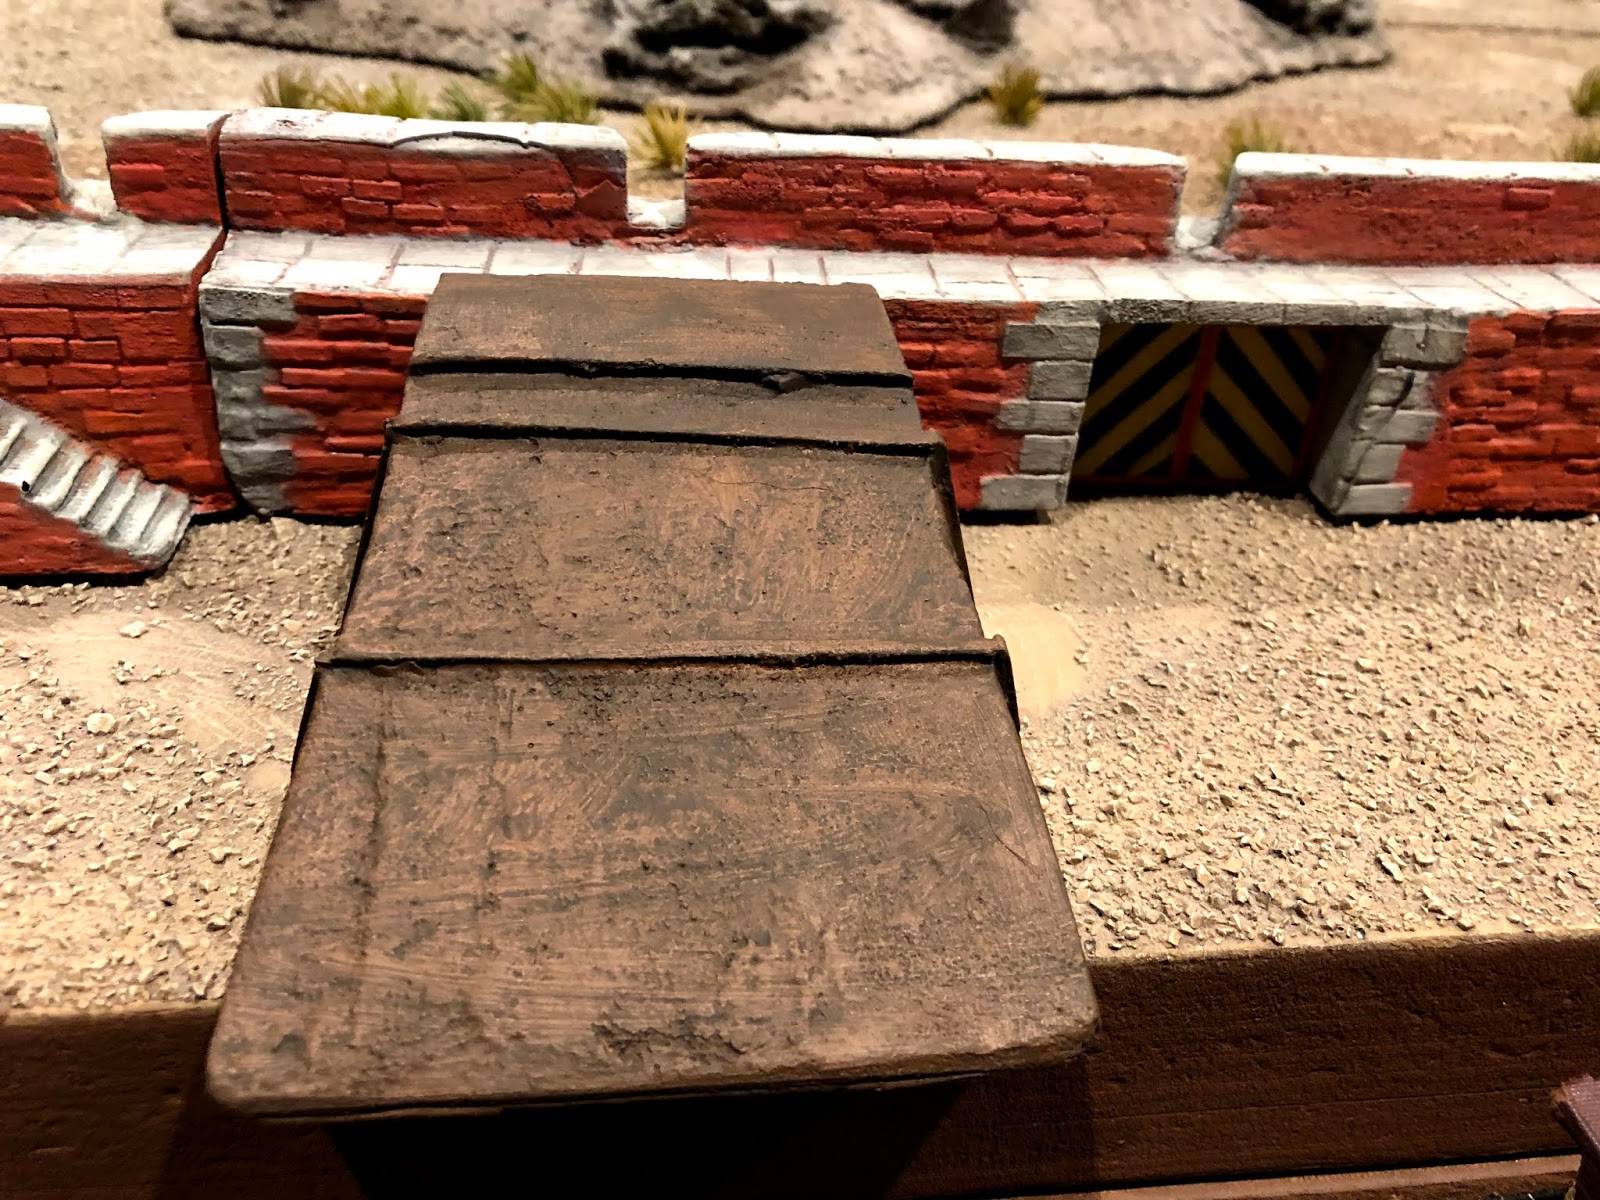
-- then a similar heavy & splotchy dry-brush of:
3. FolkArt HONEYCOMB --

-- then once more into the breach with:
4. Apple Barrel COUNTRY TAN --


Finally I dry-brushed what I deduced had to be the WOODEN BRACES crossing the ramp with a couple of lighter shades of brown/khaki, avoiding using the exact same colors as for the stonework (so NO Mudstone or Sandstone)...


Whew.
But there's no rest for the weary Vauban fortress painter, and the bricks and stones just keep comin'!
Tune in next time for Chapter IV when -- to my simultaneous horror and delight -- the stack of unpainted foam and resin GROWS; the ramps get WEATHERED (using a darker shade of wash for the raw earth); Twin Towers rise; and last but not least, my pondering of the 3/16" dilemma dealt by the slightly oversized ramps, deliverss a flush...
Lovely looking tower,I really like your chalky wash, difficult over here without the Canadian source,I wondered about using a matt glaze and diluting less, although to be honest my scenery/ terrain is more panto than realistic!
ReplyDeleteBest Iain
This is fast turning into a masterclass.
ReplyDelete